

Over the last few weeks, I’ve been noodling on a good way to get B2B synchronization to work (similar to cross-tenant synchronization) involving Microsoft 365 Government Community Cloud High (GCCH) and Microsoft 365 Worldwide/Commercial.
While there is a preview available for cross-cloud synchronization, it’s a ways off from being generally available. This solution may not have a direct upgrade path, so just keep that in mind.
The reason for this type of solution is to enable organizations that have two or more tenants spanning commercial and national clouds (such as GCCH) to have the benefits of a GAL sync solution along with pre-provisioning B2B sharing.
The solution is relatively straightforward and includes step-by-step instructions for configuring Azure AD / Entra ID connect installations, deploying custom synchronization rules, configuring Azure Automation to use managed identities, and PowerShell runbooks.
Let’s get going!
Scenario
Assume you have the following configuration:
- A forest or domain configuration that includes easily identifiable user objects for each set of users. Potential examples include:
- A single forest with two domains: the root-level forest (forest.com) and a child domain (child.forest.com)
- A single forest with at least three domains: an empty root-level forest (forest.com) and child domains for each of the groups of users (child1.forest.com and child2.forest.com)
- Two completely disconnect user/domain forest scenarios (forest1.com and forest2.com or domain1.forest1.com and domain2.forest2.com).
- One tenant for each group of users (for example, Commercial TENANT1, containing users synchronized from FOREST1 and GCC High TENANT2, containing users synchronized from FOREST2).
The goal is to synchronize users from each domain:tenant relationship as B2B uses in another tenant.
Overview of the solution
In this solution, we’re going to walk through enabling and configuring a cross-cloud synchronization solution. The solution involves synchronizing users (or a subset of users) from one tenant into a partner tenant and converting the synchronized users in the partner tenant to B2B guest users. The conversion will happen as part of a scripted process that takes the newly synchronized partner users and generates an Azure B2B invitation.
This will enable both GAL visibility (like a GAL Sync solution) as well as inter-tenant collaboration. The following diagram depicts the solution at a high-level:
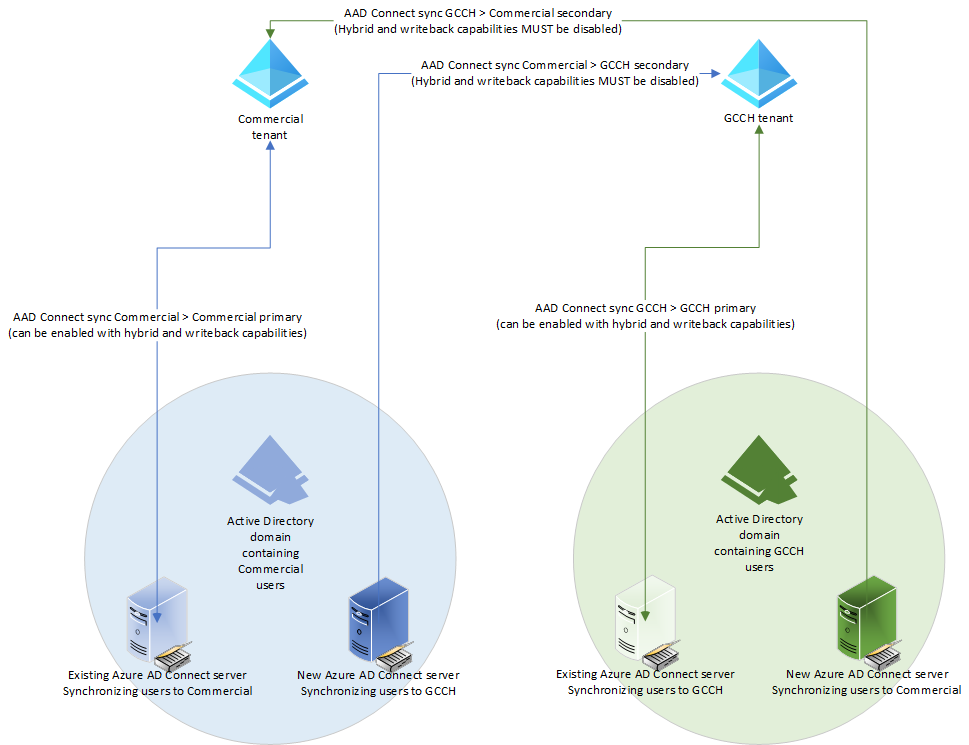
While this is targeted to organizations existing in multi-cloud scenarios (such as a global business that has users in both the Microsoft 365 worldwide/commercial cloud and one of the Microsoft 365 GCC clouds), it will also work in other scenarios (though the standard cross-tenant sync, also in preview, and provisioning is the recommended solution).
This solution will require the provisioning of two additional Azure AD Connect servers (one in each domain containing users to be synchronized to the partner tenant) as well as an Azure subscription in each tenant to allow the configuration and deployment of an Azure PowerShell runbook (to handle the cross-cloud invitations). Throughout this document, I will make the following references:
- COMMERCIAL – Refers to a commercial tenant, but can also be substituted for TENANT1.
- GCCH – Refers to a US Government Community Cloud High tenant, but can also be substituted for TENANT2.
- DOMAIN1 – Refers to the domain connected to TENANT1.
- DOMAIN2 – Refers to the domain connected to TENANT2.
- HOME TENANT – The tenant where a user originates. For example USER1 in DOMAIN1 is synchronized to TENANT1. This makes TENANT1 their HOME TENANT. When USER1 is synchronized to TENANT2 (as part of the cross-cloud synchronization), they’ll be configured as a GUEST in TENANT2 and the account synchronized to TENANT2 will be invited and connected to the account in the HOME TENANT (TENANT1).
- PARTNER TENANT – The tenant where a user is synchronized as a guest. For example, if USER1 is in DOMAIN1 and is synchronized to TENANT1 as their HOME TENANT, TENANT2 would be their partner tenant.
After identities have been synchronized, an Azure PowerShell Runbook will be configured that will look for new users in-scope for the cross-cloud invitation processing since the last runtime and generate new invitations.
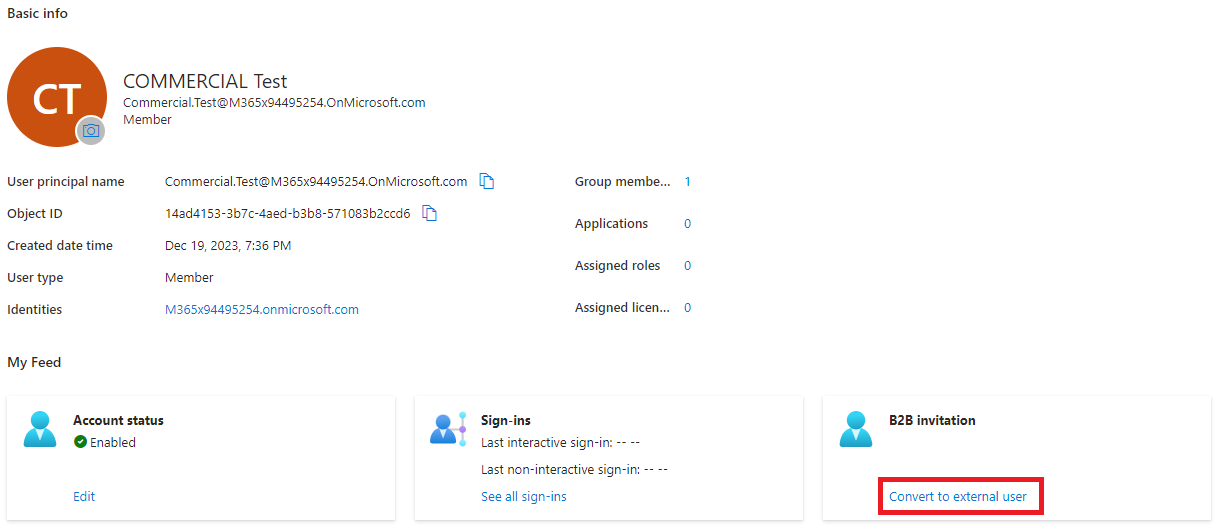
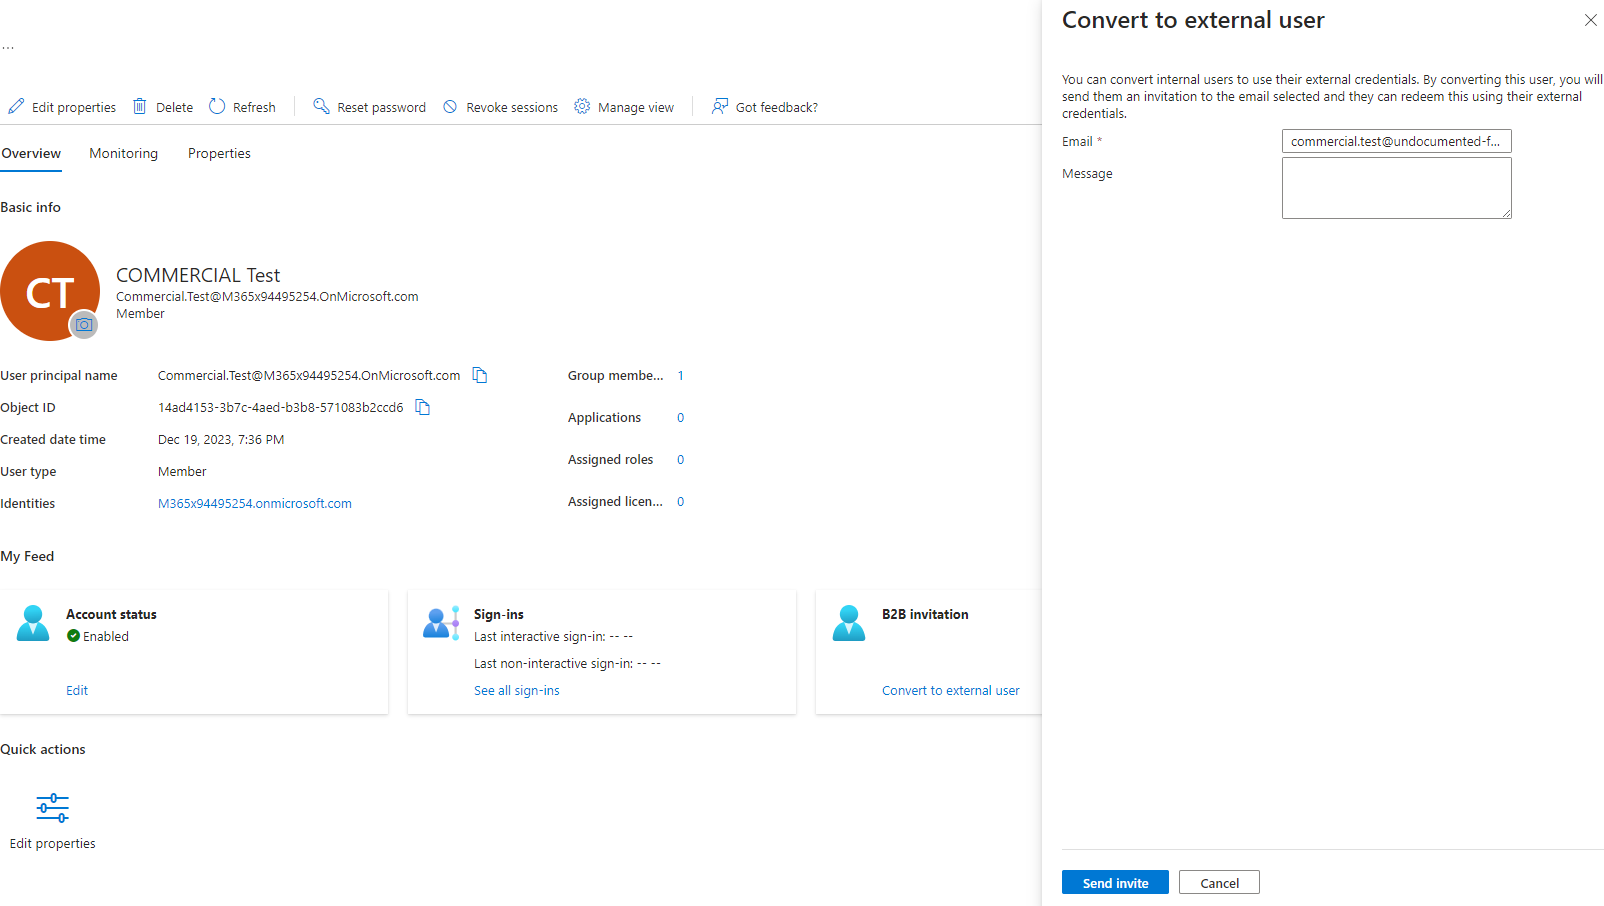
The invitation process is an automation of the Convert to external user option in the Azure portal:
Enabling Cross-cloud settings
Before you begin configuring cross-cloud B2B, you need to enable the organizations to communicate.
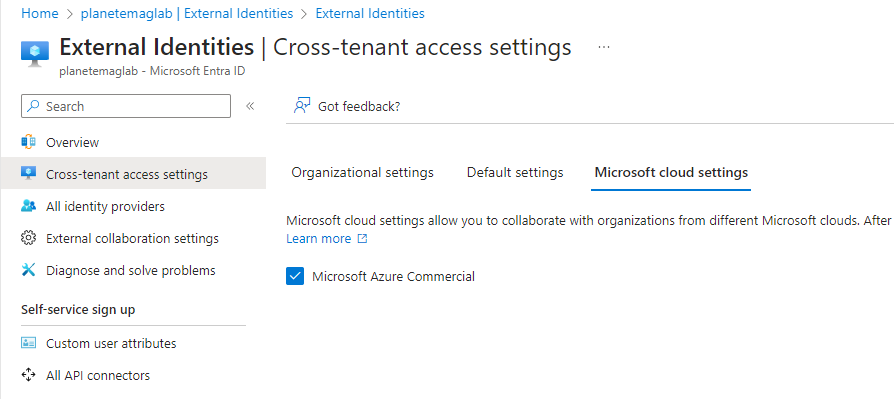
GCCH
In this section, you’ll enable the GCCH tenant to communicate with the commercial tenant.
- Navigate to https://portal.azure.us
- Under Manage, select External Identities.
- Select Cross-tenant access settings.
- On the Microsoft cloud settings tab, select Microsoft Azure Commercial and click Save.
Commercial
In this section, you’ll enable the commercial tenant to communicate with the GCCH tenant.
- Navigate to https://portal.azure.com.
- Under Manage, select External Identities.
- Select Cross-tenant access settings.
- On the Microsoft cloud settings tab, select Microsoft Azure Government and click Save.

These steps will enable the ability for you to add and manage the ability of cross-cloud communications.
Adding tenants
After the cross-cloud settings have been updated, it’s time to add your tenants as partners or collaborating organizations.
GCCH
In this section, you’ll add the Commercial tenant as a collaborating organization.
- Navigate to https://portal.azure.us
- Under Manage, select External Identities.
- Select Cross-tenant access settings.
- On the Organizational settings tab, click Add organization.

- On the Add organization flyout, enter one of the following identifiers for the commercial tenant:
- Tenant ID
- Default domain (onmicrosoft.com)
- One of the verified domains
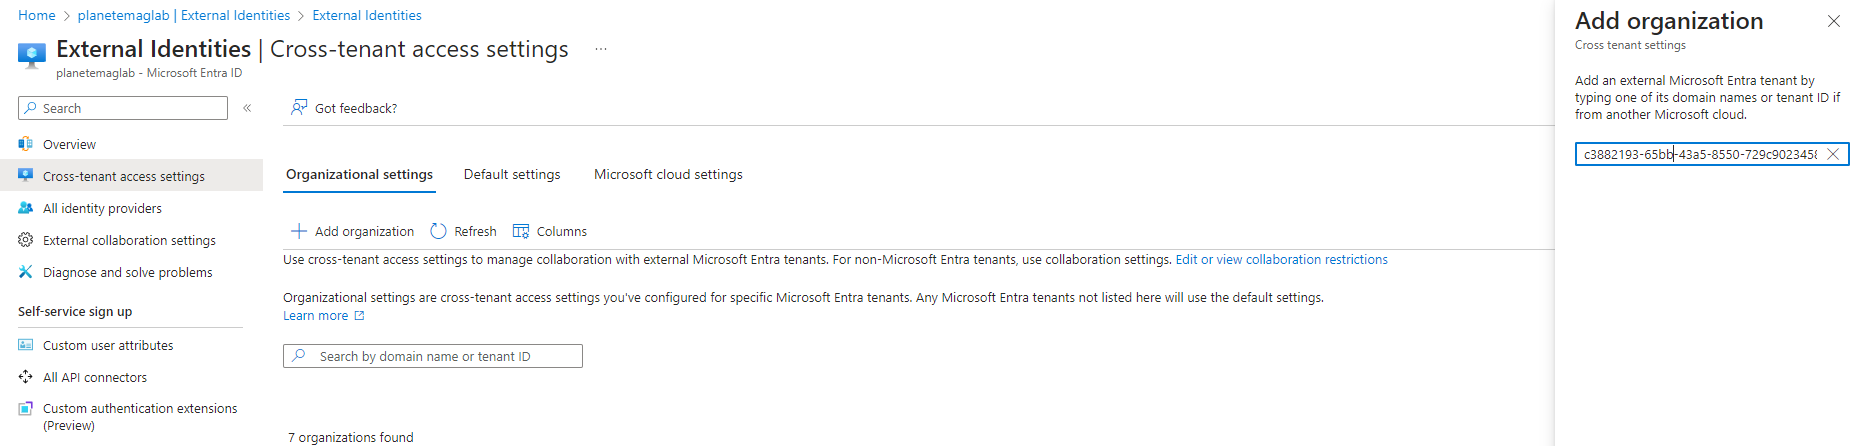
- Click Add.
Commercial
In this section, you’ll add the GCCH tenant as a collaborating organization.
- Navigate to https://portal.azure.com.
- Under Manage, select External Identities.
- Select Cross-tenant access settings.
- On the Organizational settings tab, click Add organization.
- On the Add organization flyout, enter one of the following identifiers for the commercial tenant:
- Tenant ID
- Default domain (onmicrosoft.com)
- One of the verified domains
- Click Add.
Configuring cross-tenant security settings
In this section, you’ll configure the sharing and security settings between tenants.
Inbound access settings
Configuring the inbound settings is important to help automate the workflows and ensure that invitations are allowed.
In each tenant, perform the following actions:
- Navigate to Azure Portal (https://portal.azure.us or https://portal.azure.com).
- Select External Identities.
- Select Cross-tenant access settings.
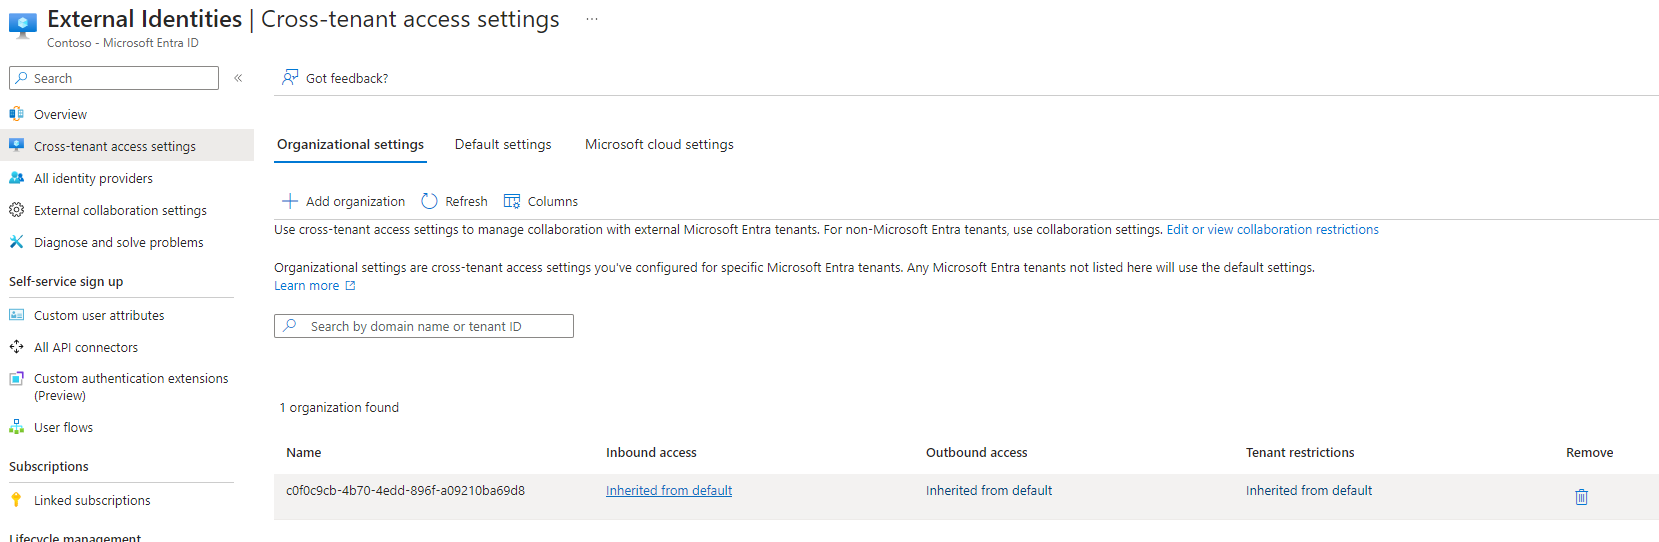
- Select the Organizational settings tab.
- For the organization that you are establishing communications with, select the reference tenant object and the value in the Inbound access column.
- On the B2B collaboration tab, ensure that the radio button Allow access is enabled.
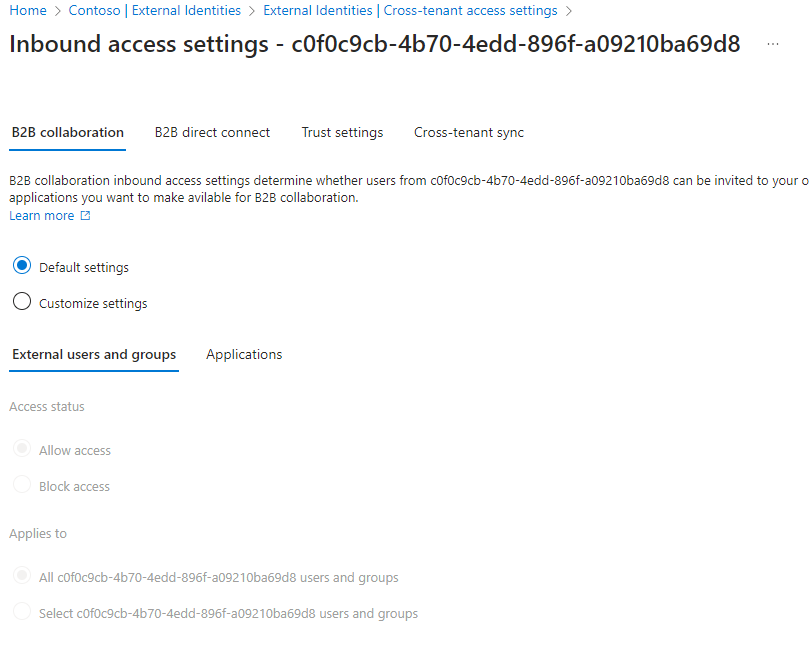
If the tenant’s default policy is block, then you will need to select the Customize settings radio button and then update the Access status to Allow access. Repeat for the Applications tab. - On the Trust settings tab, enable Automatically redeem invitations with the tenant <identifier> to allow Azure AD to automatically redeem invitations on end-users behalf. This setting isn’t necessary for this solution, but when cross-tenant collaboration becomes available for cross-cloud use cases, you’ll want this configured.
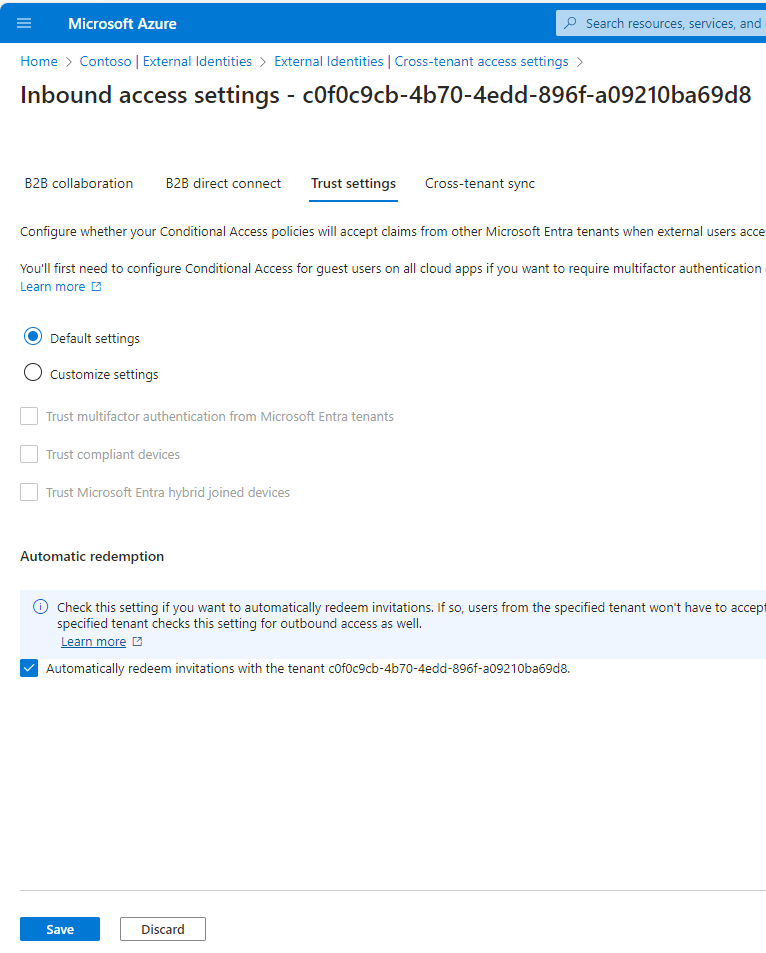
- Click Save.
Outbound access settings
- Click the breadcrumb trail to go back to the Cross-tenant access settings.
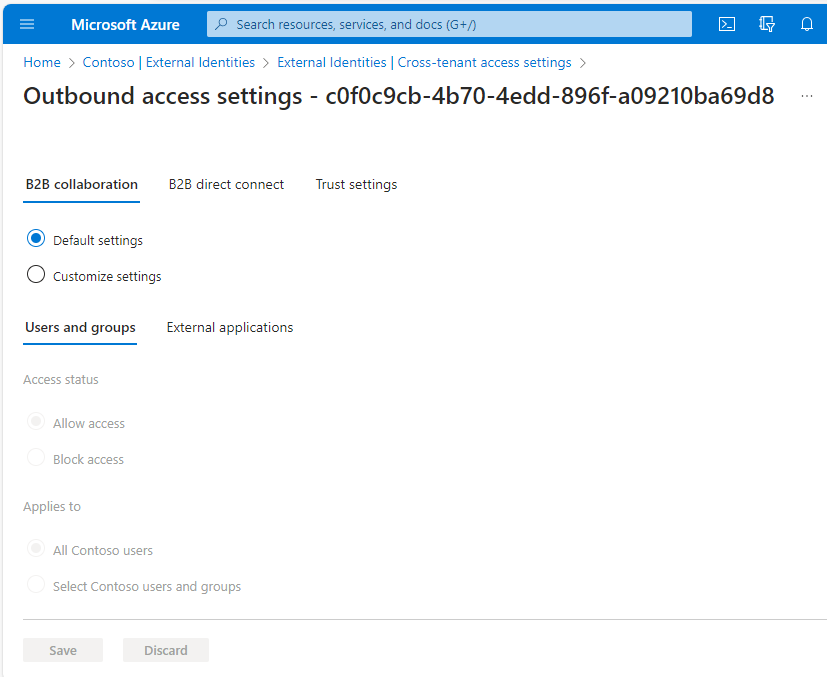
- For the organization that you are establishing communications with, select the reference tenant object and the value in the Outbound access column.
- On the B2B collaboration tab, ensure that the access status is set to Allow access for both Users and Groups and External applications. If the default policy is already configured to allow, you don’t need to do anything. If it’s not, you’ll need to select Customize settings and then configure the Allow access option. Click Save when finished.
- On the B2B direct connect tab, ensure that the access status is set to Allow access for both Users and Groups and External applications. If the default policy is already configured to allow, you don’t need to do anything. If it’s not, you’ll need to select Customize settings and then configure the Allow access option. Click Save when finished. B2B direct connect is only supported for Teams currently.
- On the Trust settings tab, select Automatically redeem invitations with the tenant <identifier> and click Save. Again, this setting isn’t necessary for this solution, but when cross-tenant collaboration becomes available for cross-cloud use cases, you’ll probably want this configured.
You’ll need to perform these modifications (Inbound access settings, Outbound access settings) in both the commercial tenant and the GCCH tenant.
Configuring object synchronization
In this section, you’ll be configuring an additional Azure AD Connect (Entra ID Connect) server to synchronize identity from one AD domain or organizational unit structure to the partner tenant. Your fully-configured environment should contain one Azure AD Connect server per AD domain synchronizing to its primary tenant (GCCH domain to GCCH tenant; commercial domain to commercial tenant), as well as a secondary set of Azure AD Connect servers synchronizing to the partner tenant (GCCH domain to commercial tenant; commercial domain to GCCH tenant).
It’s critical to pay attention to the steps outlined—especially concerning Write back options (DON’T DO IT—it’s not a supported topology) and not performing an initial sync as part of the wizard (DON’T DO IT—we’ll need to configure custom synchronization rules before the initial sync).
Deploying AAD Connect
This process will need to be repeated for each source domain:tenant pair. In this example, I’ll be installing AAD connect into DOMAIN1 and configuring it to synchronize with TENANT2. After this process is completed, you’ll need to repeat it in DOMAIN2 and configure it to synchronize with TENANT1.
Note: If either of your environments are currently using Pass-through authentication (PTA), these steps will disable PTA (at least temporarily). This is a known issue, as tracked by https://learn.microsoft.com/en-us/entra/identity/hybrid/connect/how-to-connect-pta-quick-start#step-2-enable-the-feature. To work around this limitation, after following these steps, you will need to re-run AAD Connect setup on the primary server connected to your tenant, click Change sign-in, select Do not configure, and then re-select Pass-through authentication before finishing the wizard. This will re-enable pass-through authentication.
- Launch AAD Connect setup on a new server in the environment that will synchronizing its users to a different tenant (DOMAIN1 > TENANT2)
- On the Welcome page, click Next.
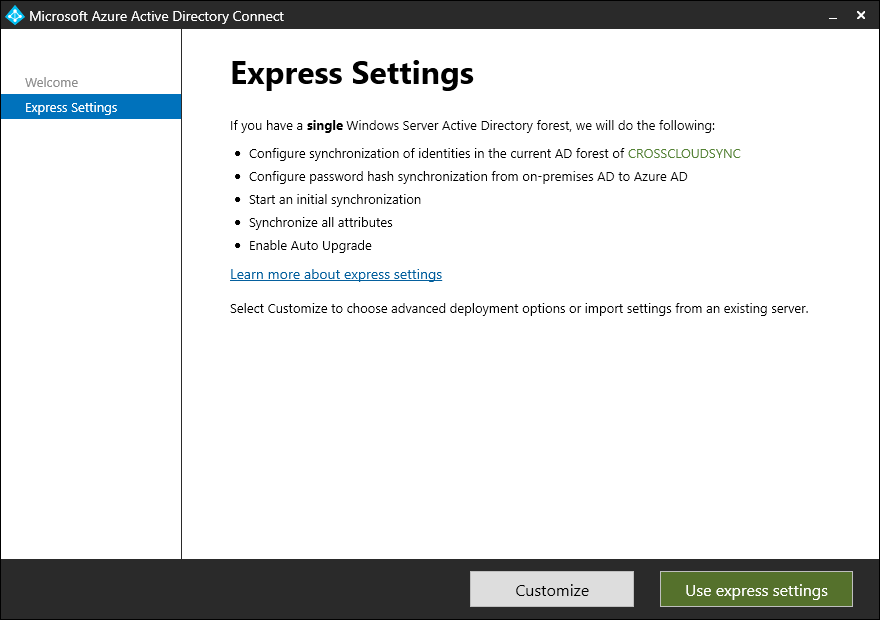
- On the Express Settings page, click Customize. Do not use the Express settings configuration.
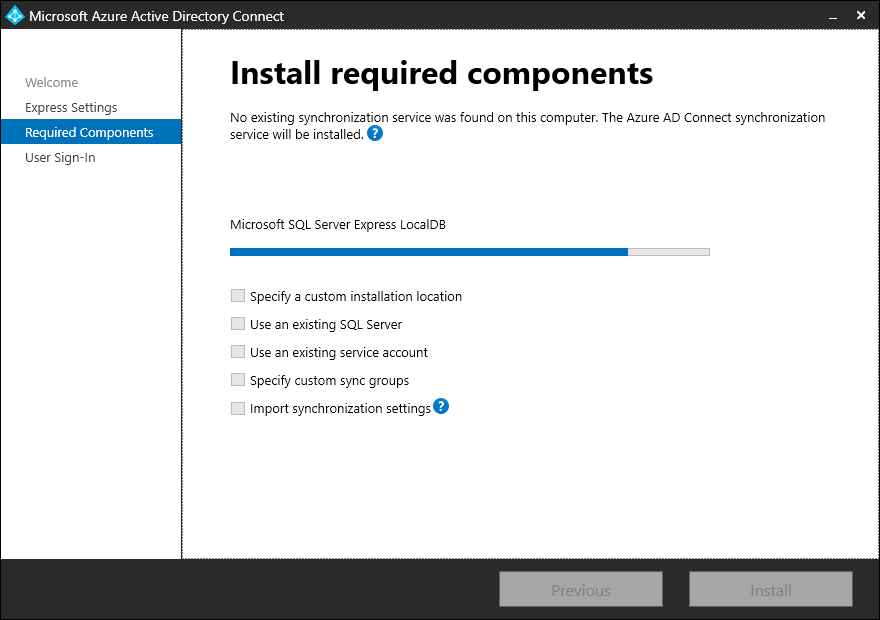
- On the Required Components page, click Install.
- On the User Sign-In page, select Do not configure. Since this deployment is for synchronizing guest identities, the login identity is going to be referred back to its home tenant for authentication.
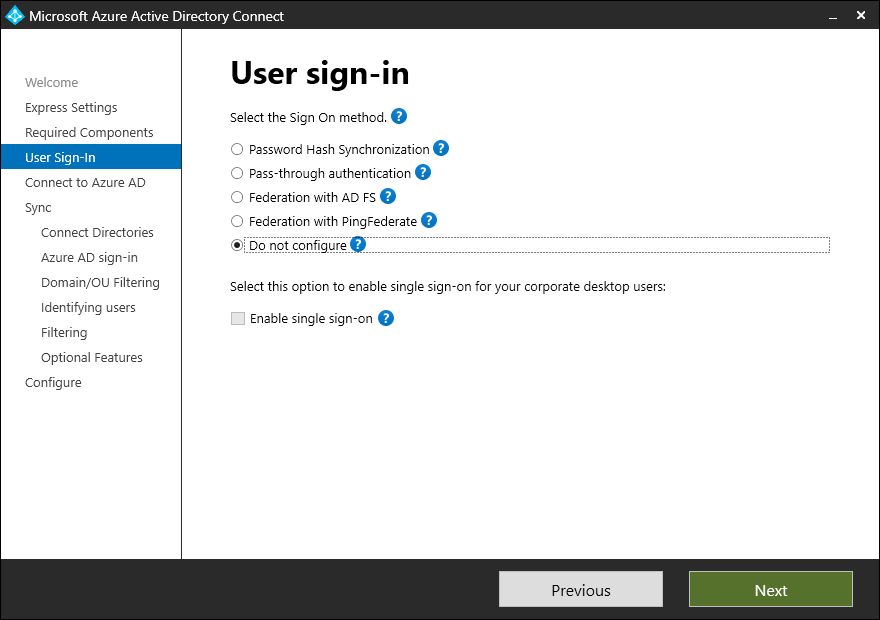
- Click Next.
- Specify the Azure AD credentials for TENANT2 and click Next.
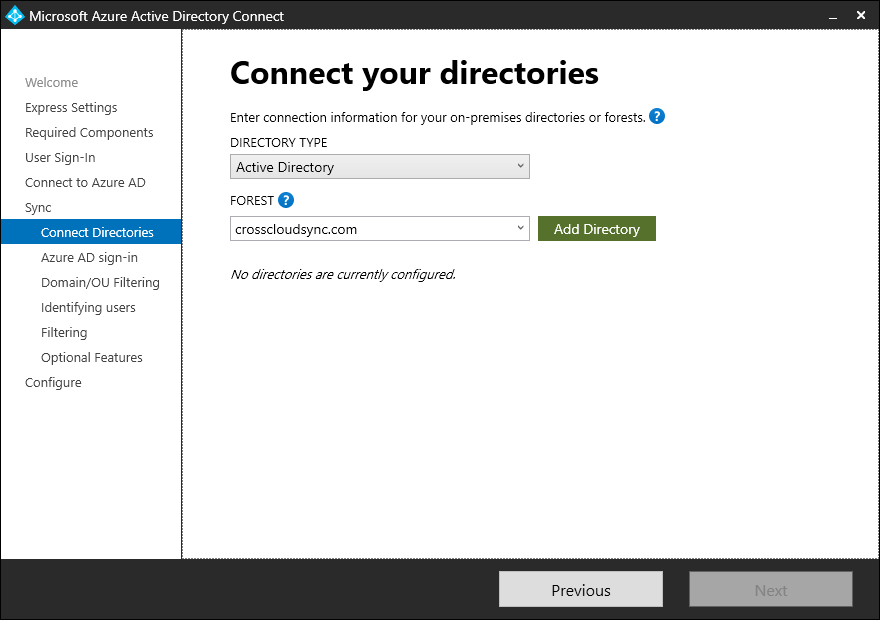
- On the Connect Directories page, select the directory from the drop down (or enter it in if the forest list is not populated) for the forest /domain that will be the source of the new B2B users. Click Add directory.
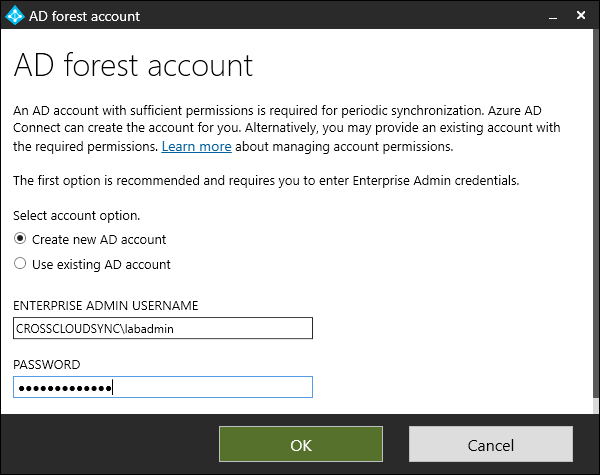
- Select the appropriate options for an account. You can use an existing account or create a new account. No writeback will be configured for these objects, since we can’t have writeback from two different sources. We recommend letting the wizard create a new account. When finished, click OK.
- Click Next.
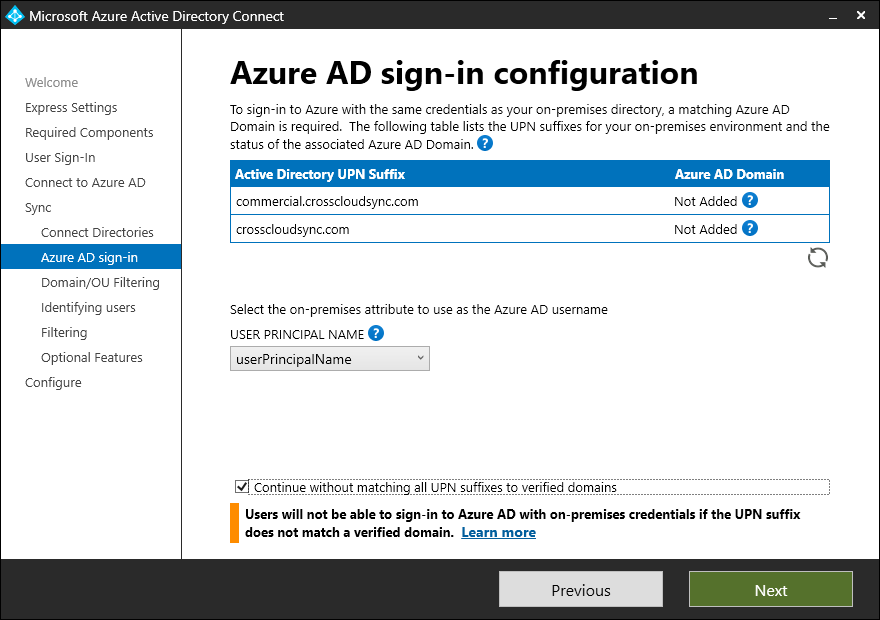
- On Azure AD sign-in page, click the Continue without matching all UPN suffixes to verified domains checkbox. A domain can only be verified in one tenant, so you won’t be able to add the domain to a second tenant. This is expected. Click Next.
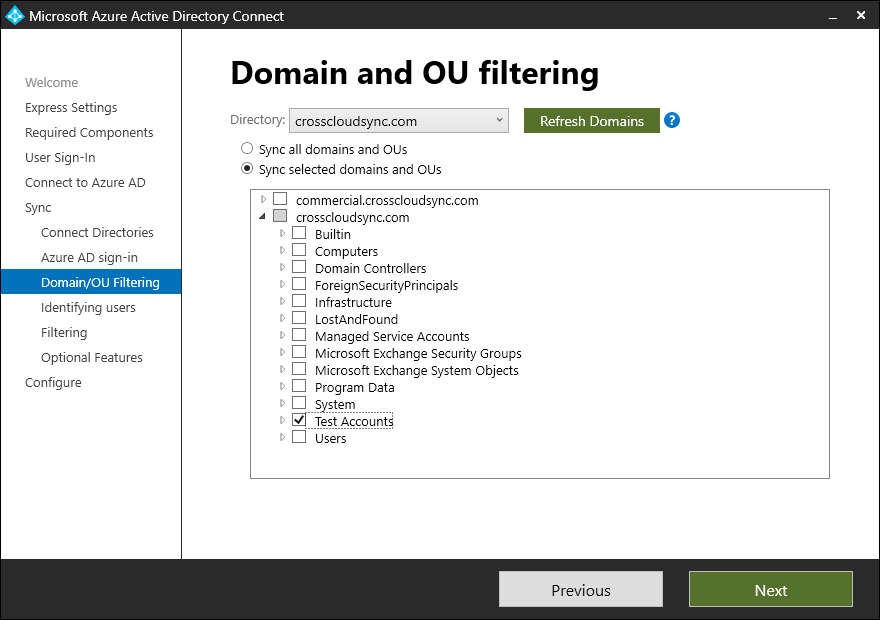
- On the Domain/OU filtering page, select only the OUs the domain that contain users to be synchronized as B2B users in the partner tenant. For example:
- If you are running the setup connected to the GCCH tenant that will be receiving commercial user accounts synced in, you’ll want to select the domain and organizational units containing the commercial users that will be synced in as guests.
- If you’re running the setup connected to the commercial tenant that will be receiving GCCH user accounts synced in, you’ll want to select the domain and organizational units containing the GCCH users that will be synced in as guests.
- Click Next.
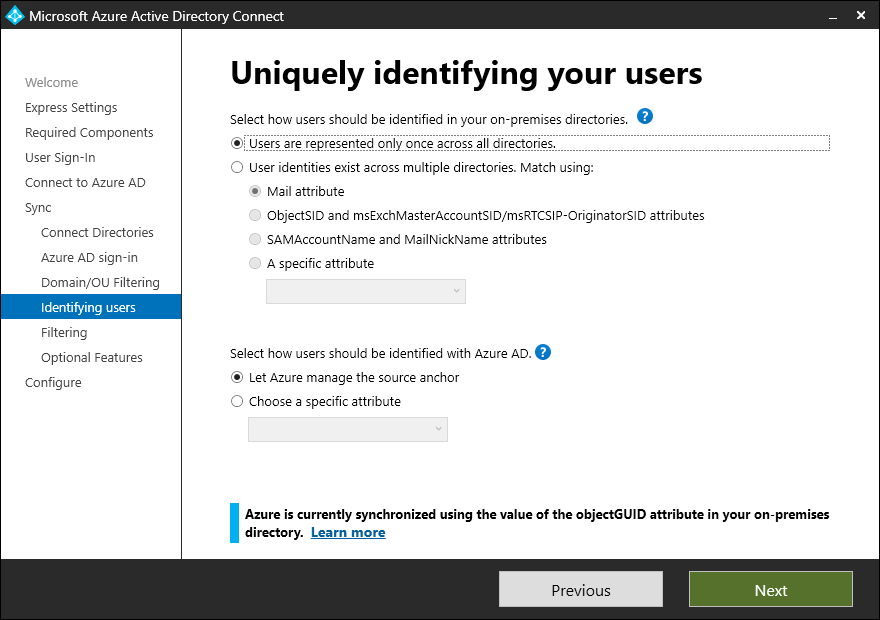
- On the Identifying users page, leave the default options selected (Users are represented only once across all directories and Let Azure manage the source anchor) and click Next.
- On the Filtering page, select Synchronize all users and devices and click Next.
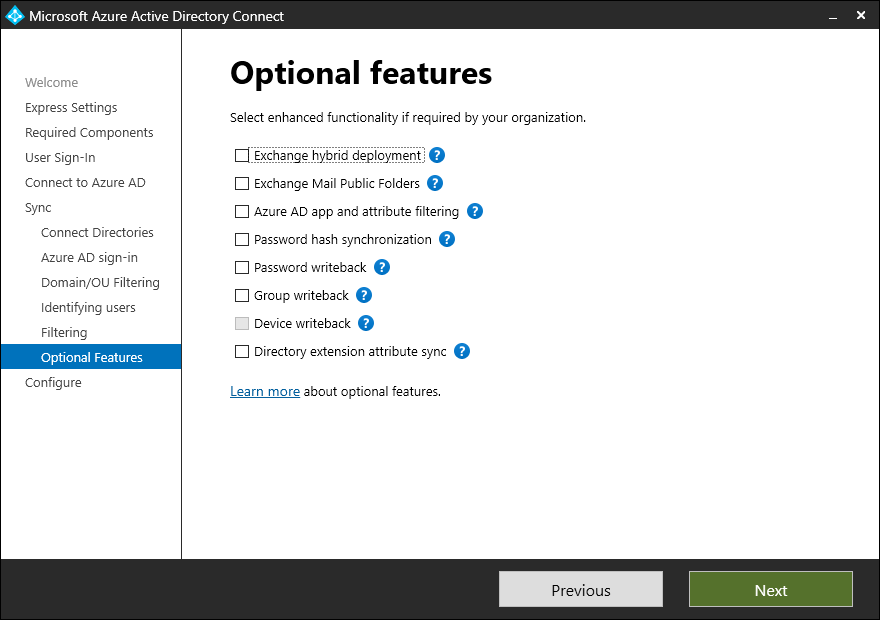
- On the Optional features page, ensure no boxes are selected and click Next.
- On the Configure page, you *must clear* the Start the synchronization process when configuration completes checkbox. Otherwise, a critical attribute will be populated incorrectly.
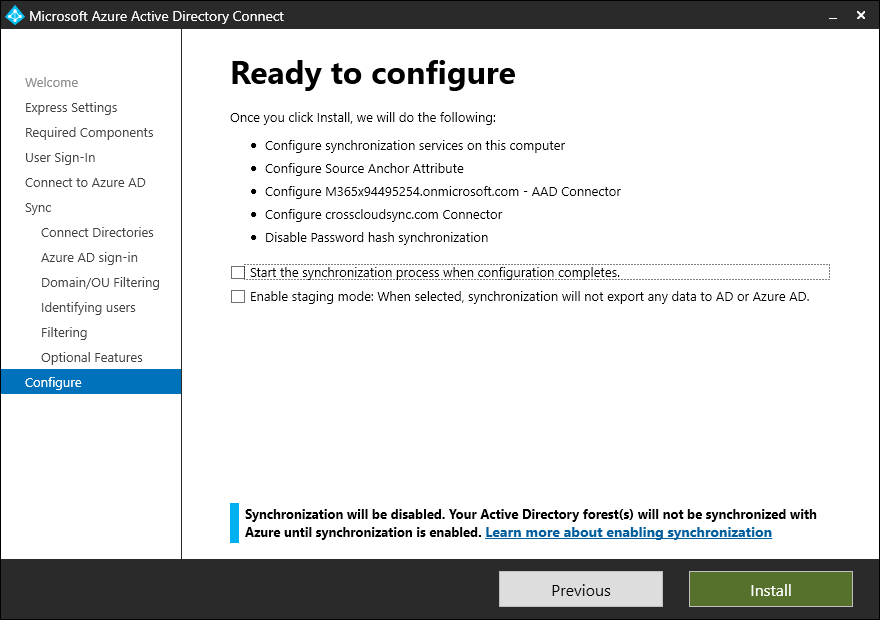
- After verifying that the Start the synchronization process when configuration completes checkbox is clear, click Install.
Repeat this process for the other domain:tenant pair. In this example, I synchronized users in DOMAIN1 to TENANT2, so I would need to repeat the process on the other AAD Connect server and configure it to synchronize DOMAIN2 to TENANT1.
Configuring synchronization rules
Synchronization rules control the flow of objects and attributes into the Microsoft 365 or Azure AD environment. There are several critical transforms rules that we’re going to put in place on the newly-configured AAD Connect servers:
- Send a
NULLvalue for theonPremisesUserPrincipalNameattribute to the PARTNER tenant. This is necessary since users synchronized with anonPremisesUserPrincipalNameattribute cannot be converted to a B2B user. - Set
msExchangeRecipientDisplayTypeto6andmsExchangeRecipientTypeDetailsto128for the synchronized users to the partner tenant. This will ensure that whenEnable-RemoteMailboxorNew-RemoteMailboxis run as part of a ‘normal’ user provisioning that a mailbox doesn’t get created for the corresponding user synchronized to the partner tenant. For more information on what these values mean, read my post about them here.
It’s important to note that even after configuring the rules and synchronizing users, a “correct” user in the PARTNER tenant will still appear to have the Azure AD attribute On-Premises UserPrincipalName configured. This value is automatically calculated–so there’s no “easy” way to verify that a user has been configured correctly.
These actions will need to be completed on each new AAD Connect server—not the existing AAD Connect Servers.
Disabling the AAD Connect sync scheduler
Azure AD Connect synchronizes on a pre-defined schedule. While you should have the initial synchronization disabled, you should also disable the scheduler in the event that something happens (such as an unexpected server restart or someone else performing an action on the server at the same time).
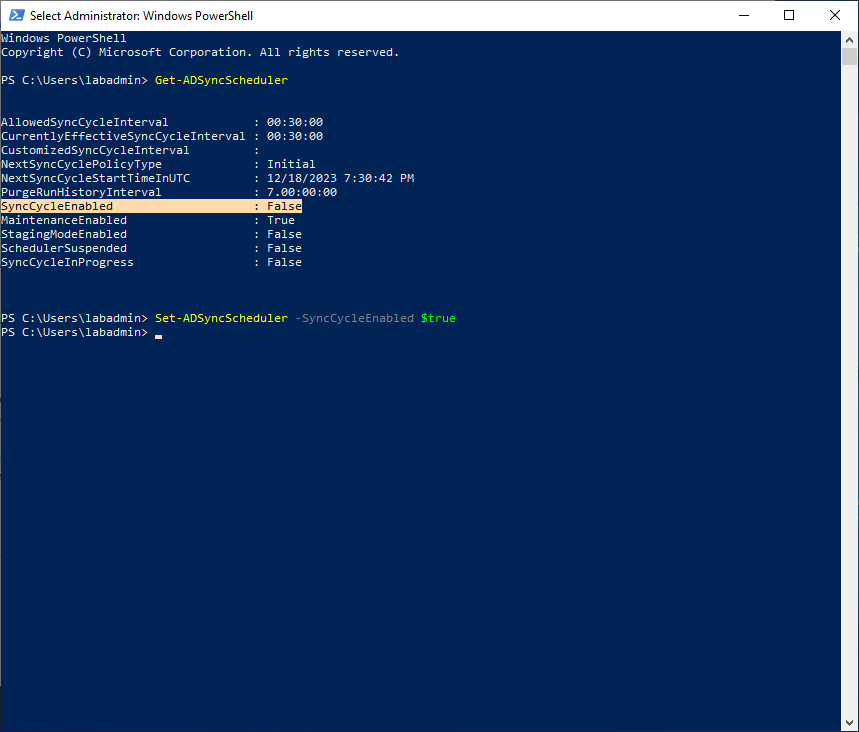
- Launch an elevated PowerShell prompt.
- Run
Set-ADSyncScheduler -SyncCycleEnabled $Falseto disable the synchronization schedule.
Adding a new rule to support the object transformation
This rule will contain the new values for onPremisesUserPrincipalName , msExchRecipientDisplayType and msExchRecipientTypeDetails values. We’ll make a CLONE of the rule and edit that rule.
- Launch the Synchronization Rules Editor.
- Under Direction, select Outbound.
- Click Add new rule.
- In the Add outbound synchronization rule wizard, on the Description tab, update the Description field to indicate that this rule will be used to update the
onPremisesUserPrincipalName,msExchRecipientDisplayTypeandmsExchRecipientTypeDetailsvalues.
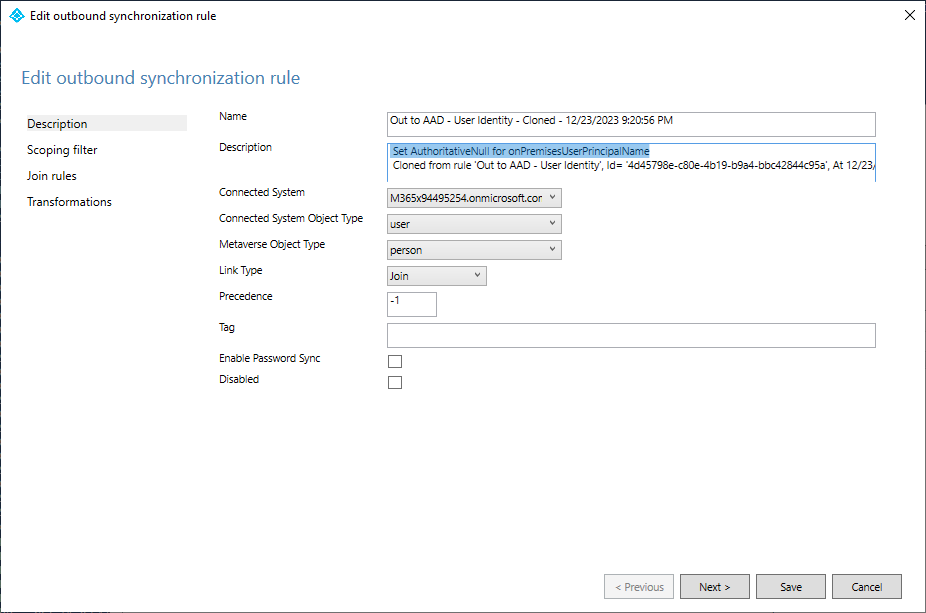
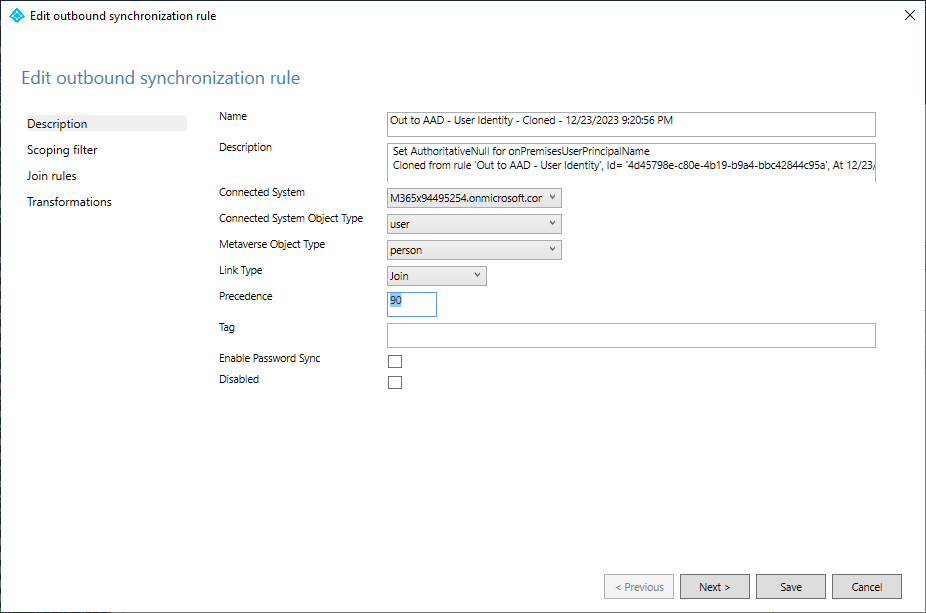
- In the Precedence box, enter an unused value lower than the existing rules. In this example, enter
90.
- Click Next.
- On the Scoping filter page, do not make any changes. Click Next.
- On the Join rules page, do not make any changes. Click Next.
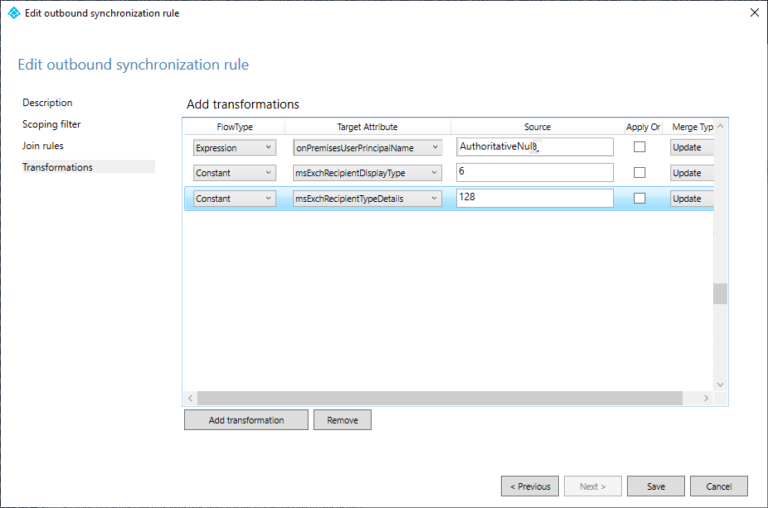
- On the Transformations page, click Add transformation.
- Under FlowType, select Expression.
- In the Target Attribute drop-down, select the onPremisesUserPrincipalName attribute.
- In the Source box, enter
AuthoritativeNull. This value is cAsE sEnSiTiVe. - Click Add transformation.
- Under FlowType, select Constant.
- In the Source box, enter
6. - Click Add transformation.
- In the Target Attribute drop-down, select the msExchRecipientTypeDetails attribute.
- Under FlowType, select Constant.
- In the Source box, enter
128. - Confirm that the dialog looks similar to the following:
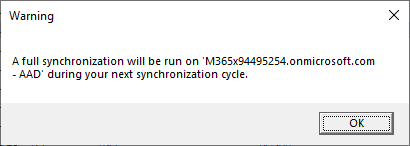
- Click Save.
- Click OK to acknowledge the message about requiring a full synchronization.
The transformations necessary to support the cross-tenant synchronization have been configured! Ta-da!
Enabling the AAD Connect sync scheduler
Now that AAD Connect has been configured, you can re-enable the synchronization schedule.
- Launch an elevated PowerShell prompt.
- Run
Set-ADSyncScheduler -SyncCycleEnabled $Trueto re-enable the synchronization schedule.
Setting up automation
From an automation perspective, each environment will need to send new invitations to the GAL Sync users. This will enable B2B collaboration using the identity in the GAL. You will need to configure an Azure Automation account and a PowerShell run book in each tenant.
Configuring an Azure Automation account
The automation account will be used to execute the run book. You can think of it much like a service account. This particular type of account will be a system-managed identity, making it ideal for running PowerShell runbooks against a tenant and will require no credential or certificate management.
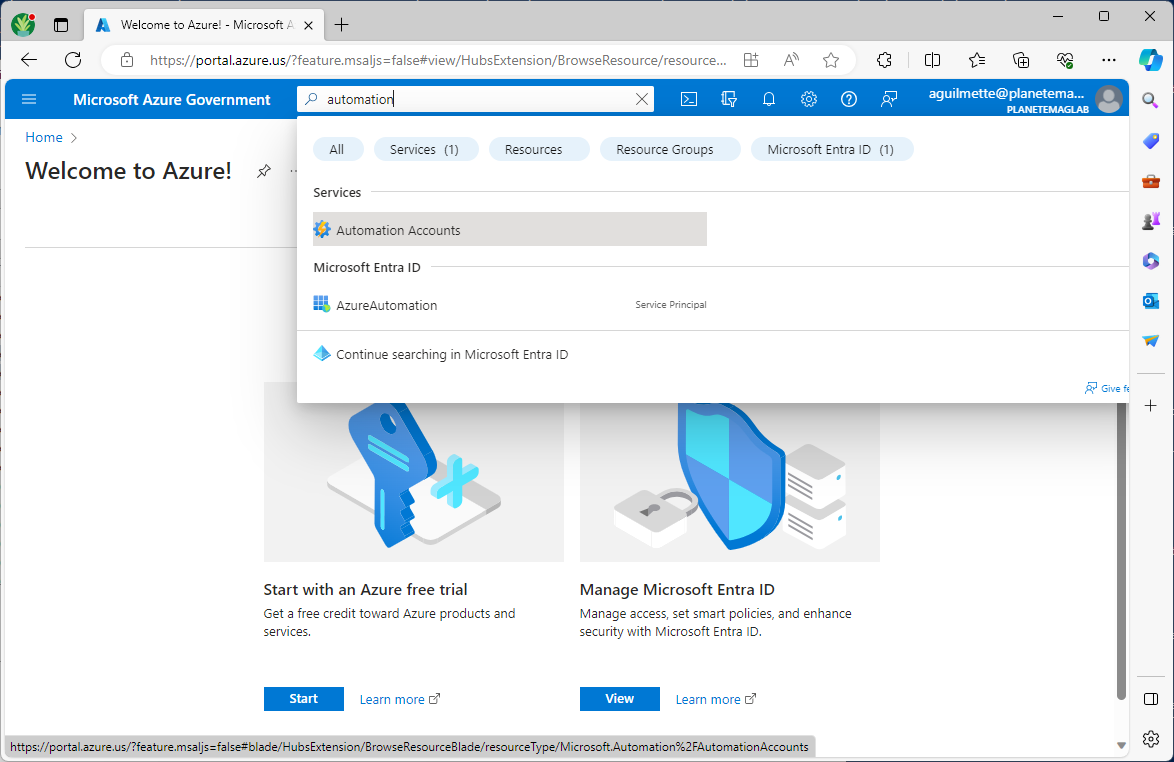
- Navigate to the Azure portal for the environment that will be hosting an external guest users from another tenant.
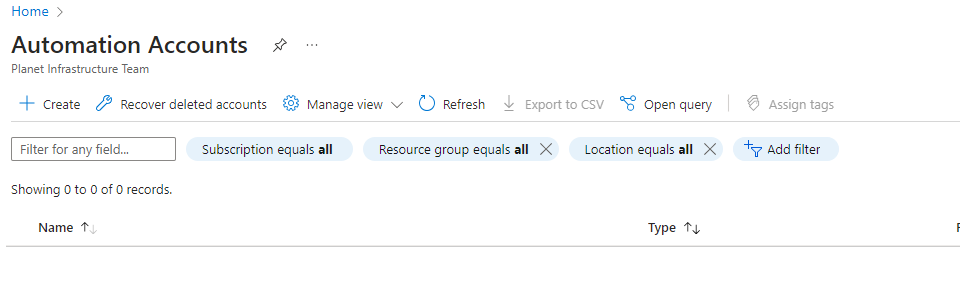
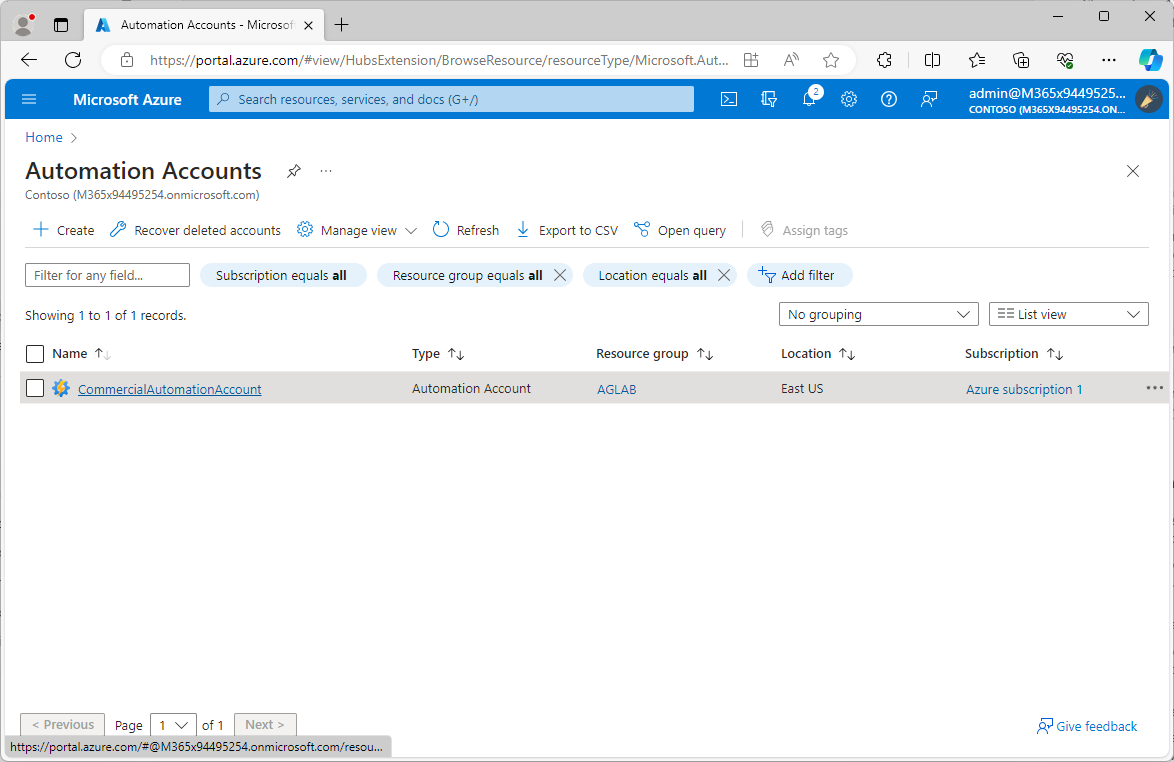
- In the Search bar, enter Automation Accounts and select the Automation Accounts option.
- Click Create.
- Select a Subscription and a Resource group (or create a new one). Give the account a Name and select a Region. When finished, select Next.

- Select System assigned identity and click Review + Create.
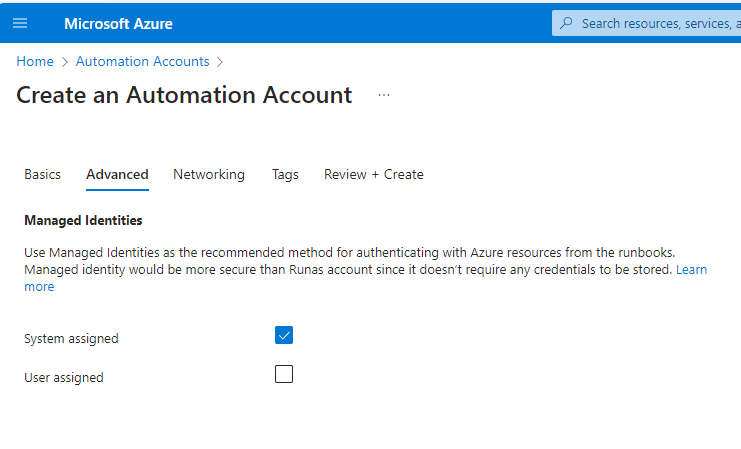
- Click Create.
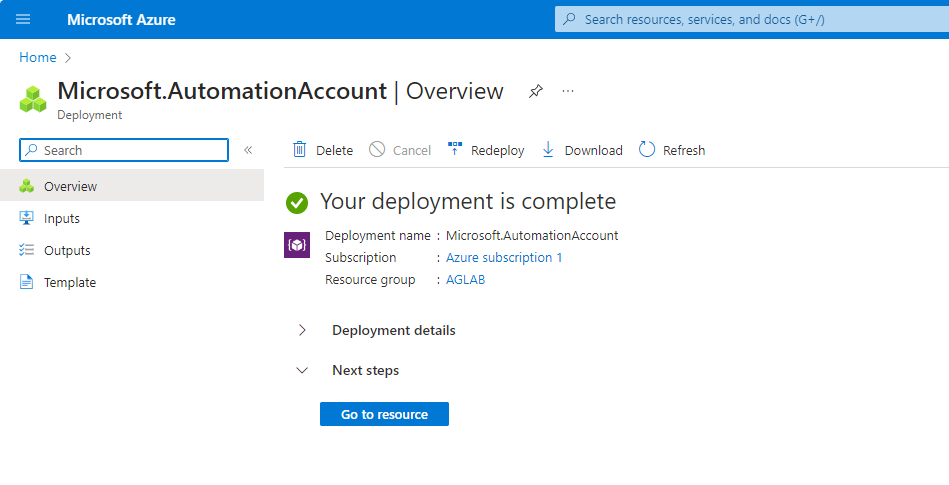
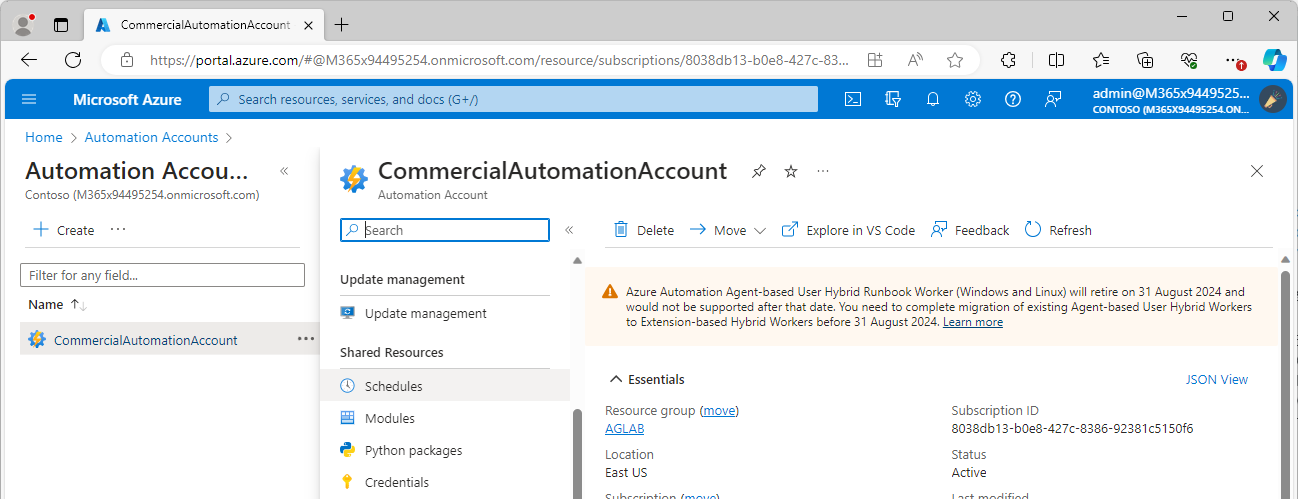
- Once the account is complete, click Go to resource.
- Under Shared Resources, select Modules. Click Add a module.
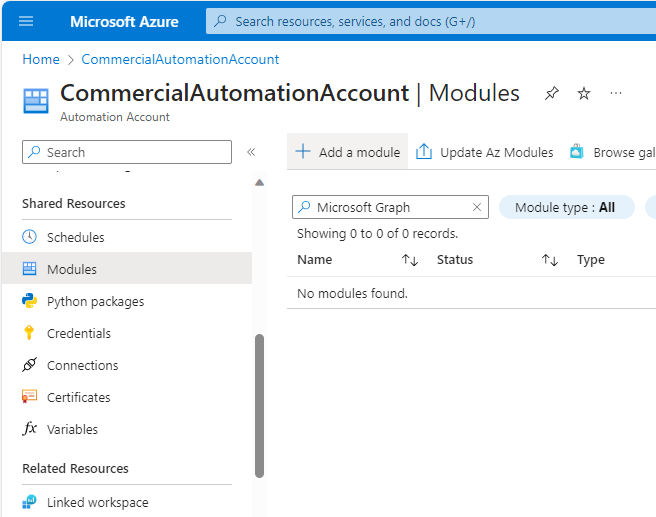
- Select Browse from gallery and then select Click here to browse from gallery.
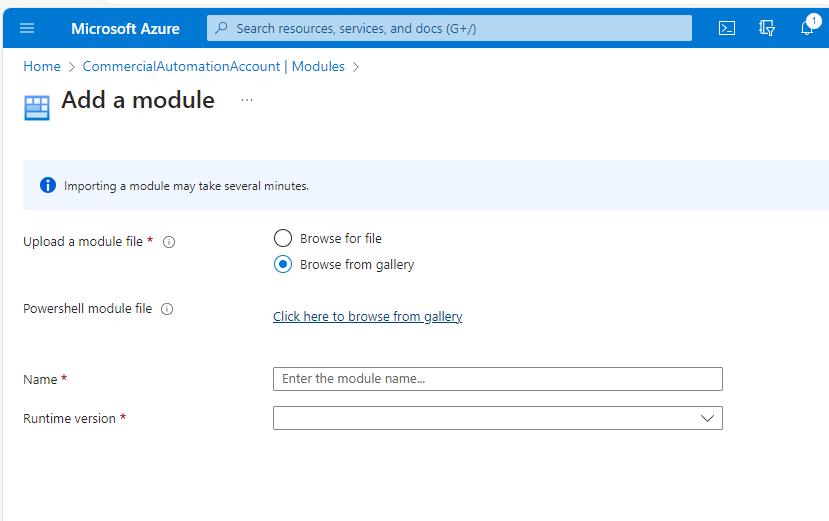
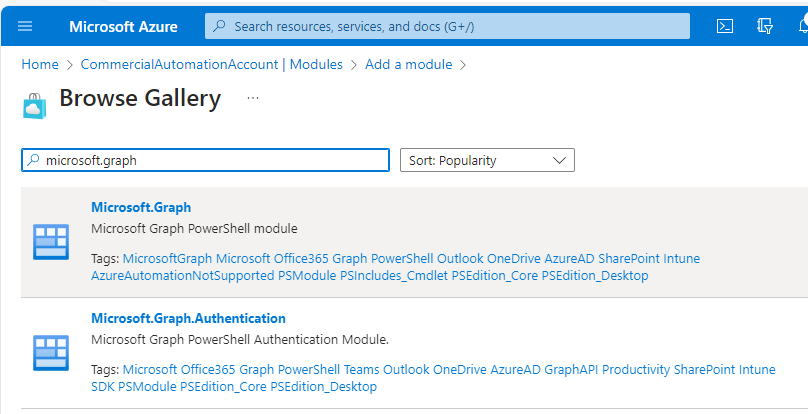
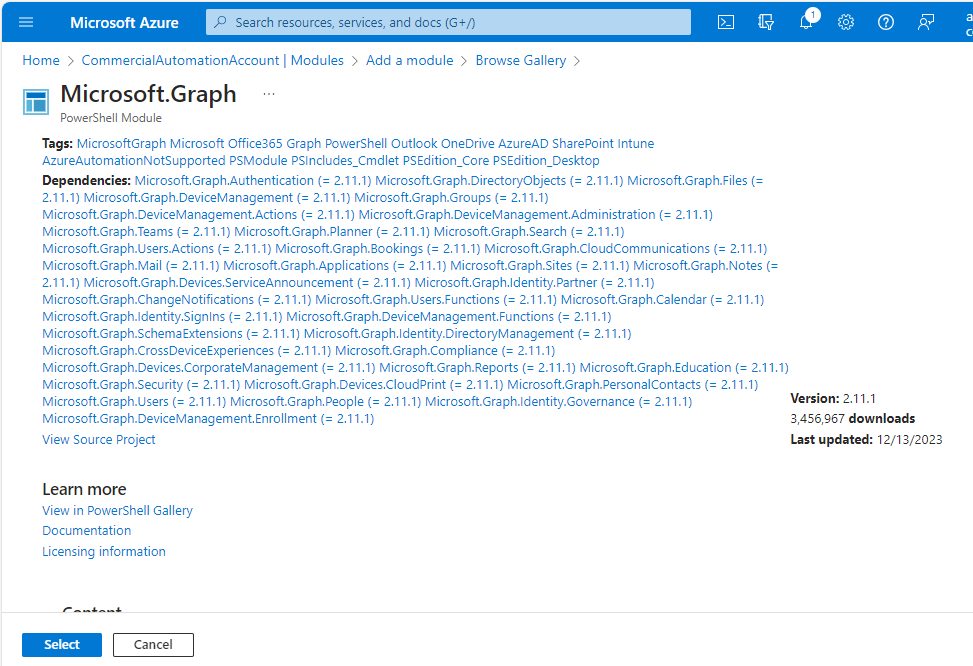
- Enter Microsoft.Graph in the search box and select the Microsoft.Graph module.
- Click Select.
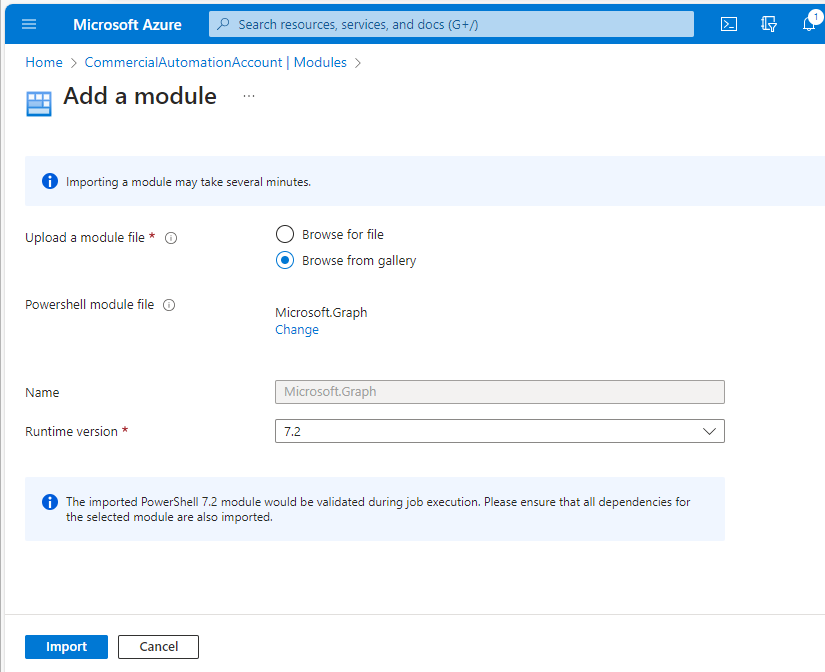
- Select the 7.2 Runtime version and click Import.
- Repeat the Add a module process (steps 8-12) for each of the following modules:
- Microsoft.Graph.Applications
- Microsoft.Graph.Authentication
- Microsoft.Graph.DirectoryObjects
- Microsoft.Graph.Files
- Microsoft.Graph.Identity.Signins
- Microsoft.Graph.Users
- Verify that all the modules have been imported correctly.
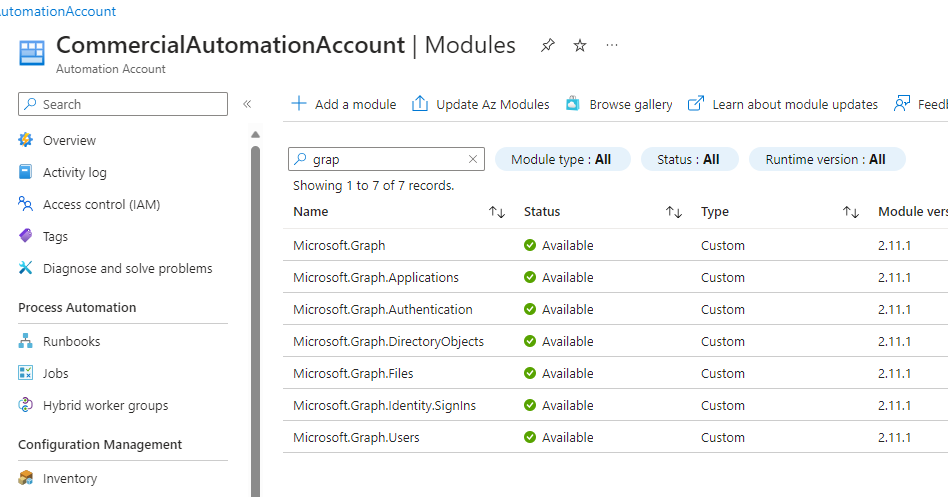
Next, we’ll set up the necessary permissions.
Adding delegated permissions the automation account
The PowerShell runbook that we’ll create requires multiple permissions to update and configure the directory, including:
User.ReadWrite.AllUser.Invite.AllDirectory.ReadWrite.All
These permissions are necessary update the directory configuration, converting members to B2B guests. You’ll need to do this in both Azure AD tenants (typically, a GCCH and a Commercial tenant).
-
- Launch an elevated PowerShell prompt.
- If you don’t already have the Microsoft Graph cmdlets, run
Install-Module Microsoft.Graph. - Run the following command:
Connect-MgGraph -Scope "Directory.ReadWrite.All", "AppRoleAssignment.ReadWrite.All", "User.ReadWrite.All", "Application.ReadWrite.All", "DelegatedPermissionGrant.ReadWrite.All"
Note: If connecting to the Azure Government environment, be sure to use the
-Environment USGOVparameter. - In the Modern Auth dialog box, enter global admin credentials for the environment.
- Locate the automation account created earlier and store it in a variable. In the previous example, it was named CommercialAutomationAccount.
$AutomationAccountId = Get-MgServicePrincipal -Filter "displayName eq 'CommercialAutomationAccount'"
- Store the Microsoft Graph App service principal in a variable.
$GraphApp = Get-MgServicePrincipal -Filter "AppId eq '00000003-0000-0000-c000-000000000000'"
- Add the delegated auth permission scopes to the Automation account.
$params = @{
"ClientId" = $AutomationAccountApp.Id
"ConsentType" = "AllPrincipals"
"ResourceId" = $GraphApp.Id
"Scope" = "User.ReadWrite.All User.Invite.All Directory.ReadWrite.All"
}
New-MgOauth2PermissionGrant -BodyParameter $params
Adding application permissions to the automation account
- Retrieve the application roles permission scopes for the Microsoft Graph app.
$GraphAppRoles = $GraphApp.AppRoles |? {$_.Value -like "User.Invite.All" -or $_.Value -like "User.ReadWrite.All" -or $_.Value -like "Directory.ReadWrite.All"} - Add the application role permission scopes to the Automation account.
Foreach ($RoleId in $GraphAppRoles)
{
     New-MgServicePrincipalAppRoleAssignment -ResourceId $GraphApp.Id -ServicePrincipalId $AutomationAccountId.Id -AppRoleId $RoleId.Id -PrincipalId $AutomationAccountId.Id
}
Verifying permissions
It’s important to make sure the permissions have been assigned to the automation account.
- Navigate to the Azure portal for the tenant where an automation account has been configured and assigned permissions.
- Select Microsoft Entra ID and then select Enterprise applications (or browse to the Enterprise Applications blade): (https://portal.azure.com/?quickstart=True#view/Microsoft_AAD_IAM/StartboardApplicationsMenuBlade/~/AppAppsPreview/menuId~/null).
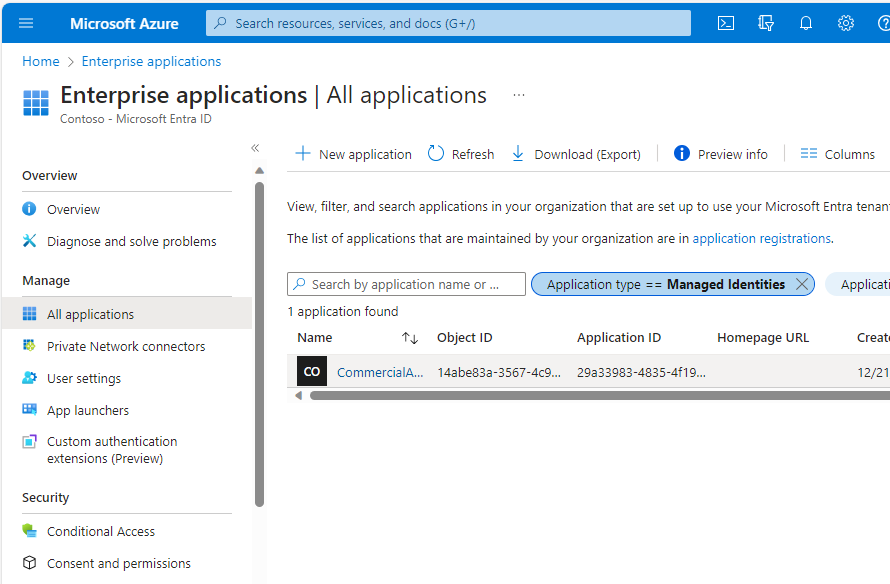
- Under Manage, select All applications and then click the Application type == Enterprise Applications filter. Select Managed identities from the drop-down and then click Apply.
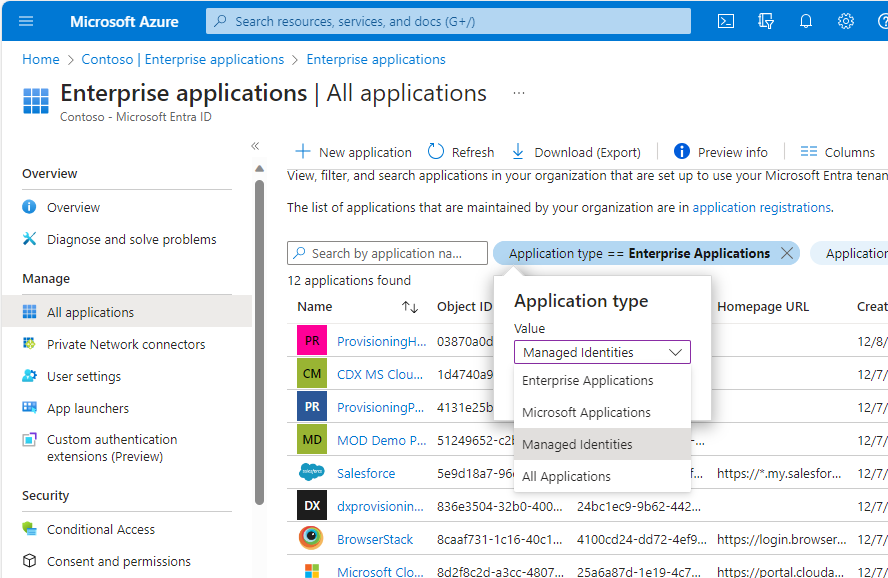
- Click the Managed Identity that you created earlier.
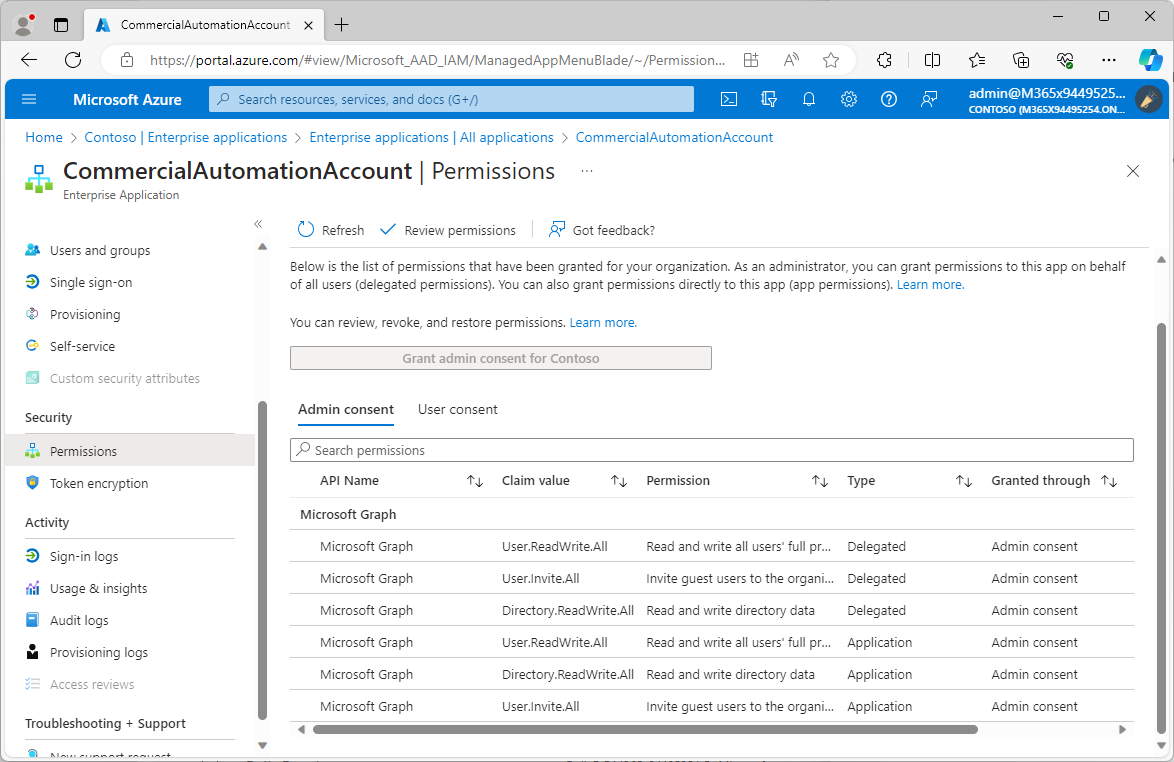
- Under Security, select Permissions and verify that the permission scopes have been granted.
Creating the PowerShell runbook
A runbook is essentially a script. There are many varieties of runbooks, but the kind that is most easily adaptable for this process is a PowerShell-based runbook.
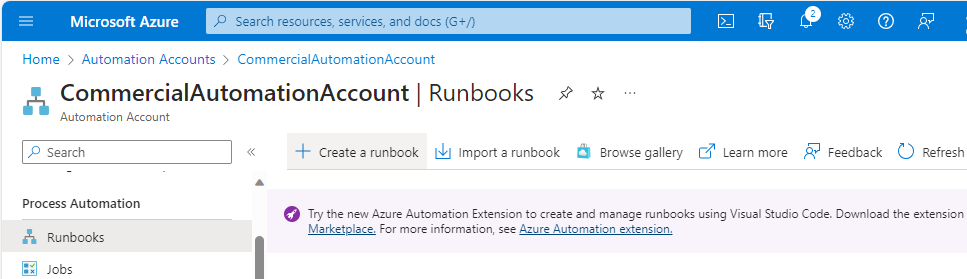
- In the Search bar, enter Automation Accounts and navigate to the Automation Accounts blade.
- Select your configured Automation Account.
- Under Process Automation, select Runbooks.
- Click Create a runbook.
- Enter a Name. Select PowerShell as the Runnbook type, select 7.2 as the Runtime version, and enter a Description. Click Create.

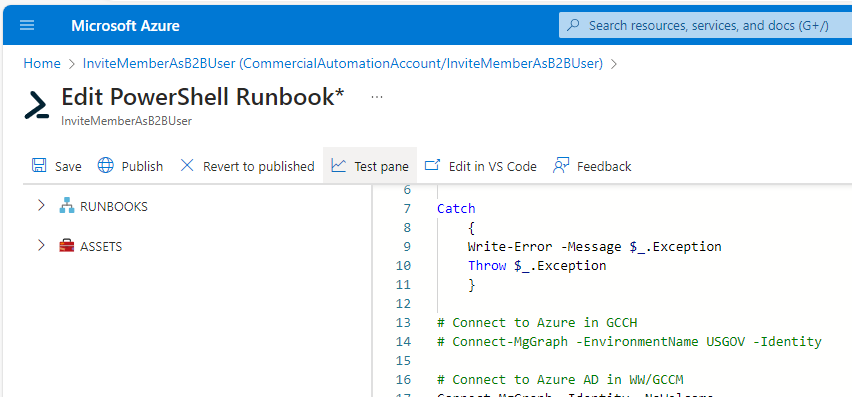
- On the Edit PowerShell Runbook page, paste the following code into the editor.
Import-Module Microsoft.Graph.Identity.SignIns
Try
{
     Connect-AzAccount -Identity
}
Catch
{
     Write-Error -Message $_.Exception
     Throw $_.Exception
}

# Connect to Azure in GCCH
# Connect-MgGraph -EnvironmentName USGOV -Identity
# Connect to Azure AD in WW/GCCM
Connect-MgGraph -Identity -NoWelcome

# Get the TenantID for the redirect URL
$TenantId = (Get-MgContext).TenantId
$InviteRedirectUrl = "https://myapps.microsoft.com?tenantid=$TenantId"

# Select all new users since last execution
[array]$Users = Get-MgUser -Filter "CreatedDateTime ge $([datetime]::UtcNow.AddHours(-25).ToString("s"))Z" -prop DisplayName,mail,Id,ShowInAddressList,OnPremisesExtensionAttributes,ExternalUserState

If ($Users)
{
     Foreach ($User in $Users)
     {
          ## Choose a method for selecting users that will have invites sent. The current invitation state is tracked by the
          ## value ExternalUserState. There are three states:
          ## $null - No invitation has been sent or redeemed
          ## PendingAcceptance - An invitation has been sent, but the recipient has not yet accepted/redeemed it
          ## Accepted

          # Select the users matching the partner tenant where the invitation hasn't been accepted or hasn't been sent
          if (($($User.mail) -match "DOMAIN1.com") -and (($($User.ExternalUserState) -match "PendingAcceptance") -or ($null -eq $($User.ExternalUserState))))
          {
               Try
               {
                    # Print the name of the in-scope, currently-processing user
                    Write-Output "Processing $($User.DisplayName)"
                    New-MgInvitation -InviteRedirectUrl $InviteRedirectUrl -InvitedUserEmailAddress $User.mail -InvitedUser $User -InvitedUserType Member -SendInvitationMessage:$True
               }
               Catch
               {
                    $ErrorResult = [system.exception]
               }
          }
     }
}
- Replace the numeric value
-25on line 24 with a value that represents the hours-interval this script will run (plus ½ to one hour extra to account for users that may been added during an overlap of synchronization schedules. For example, if you’re going execute the runbook every 24 hours, you should specify -25 as the argument for the AddHours method. If you are going to execute this runbook every 3 hours, you should specify -4 as the argument for the AddHours method. - Replace the DOMAIN1.com value on line 35 with the email address from the object’s source domain. For example, if synchronizing from GCCH to Commercial, replace the value DOMAIN1.com with the mail attribute value assigned to the users in the on-premises GCCH AD environment.
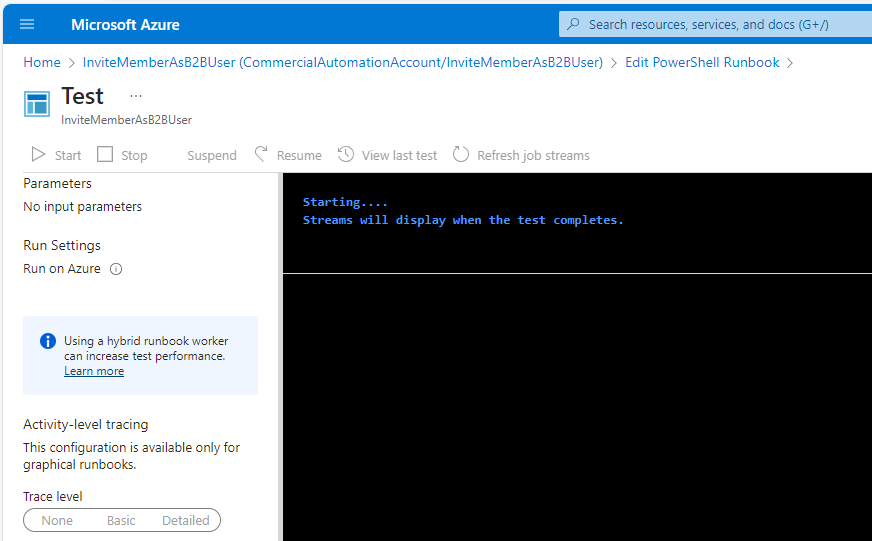
- Click Test pane to run a test.
- Click Start to execute the runbook.
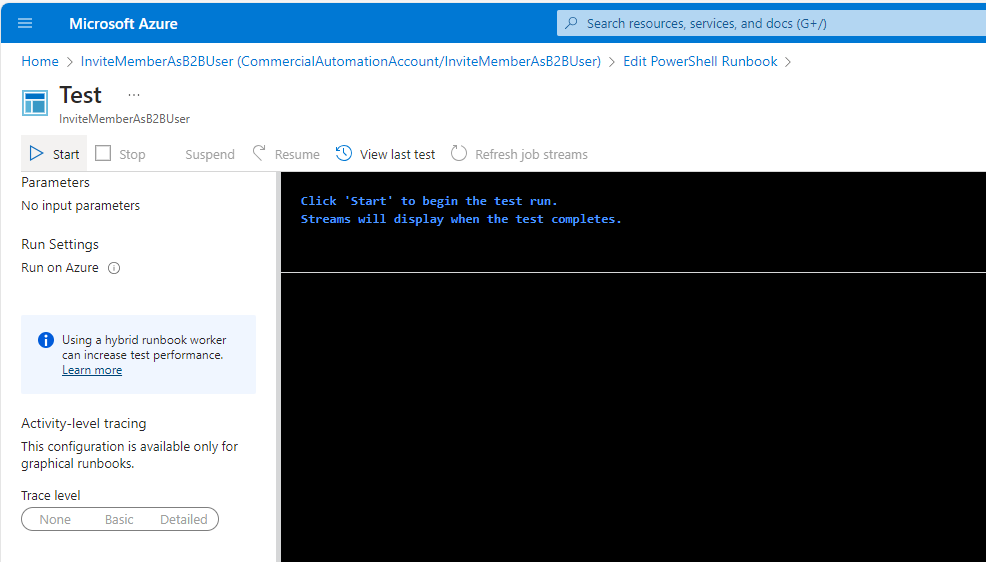
- Wait while the runbook executes.
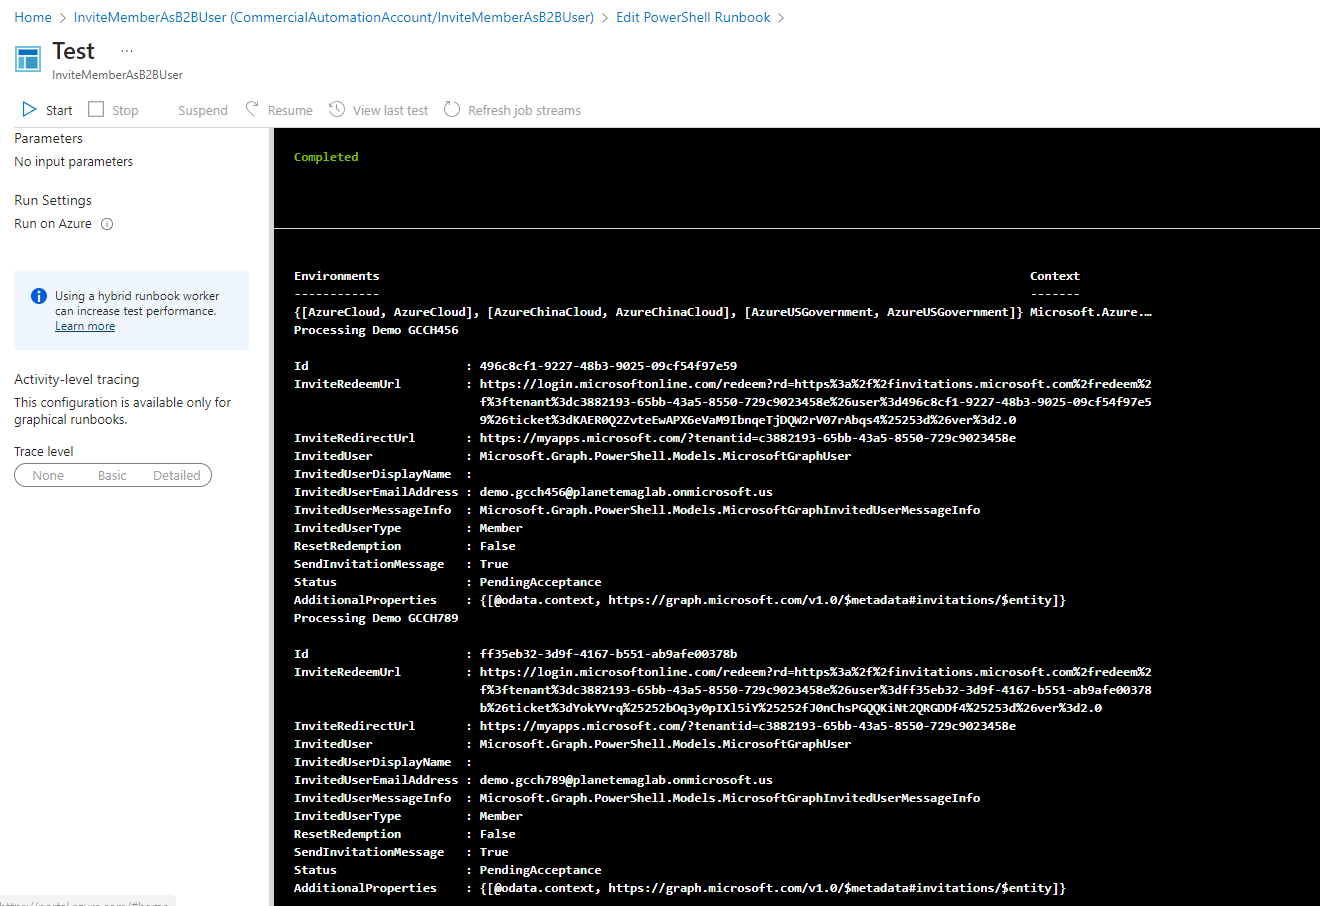
Verifying runbook execution
There are several components to verify that the runbook has completed successfully.
First, you should see output text similar to the following, indicating that users were sent invitations.
- Verify that the runbook completes successfully.
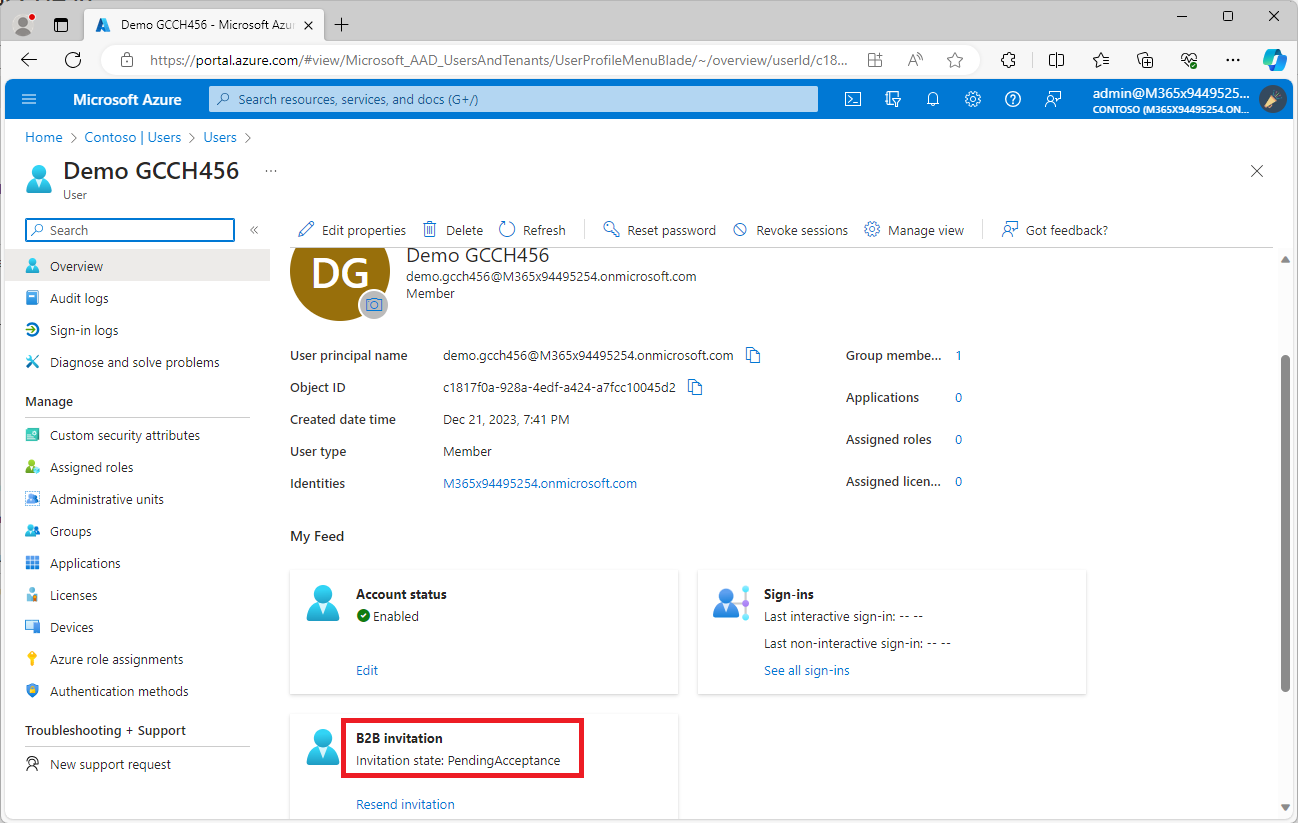
- Next, look in the Azure portal in the to verify that the partner user account has an updated B2B invitation state of PendingAcceptance.
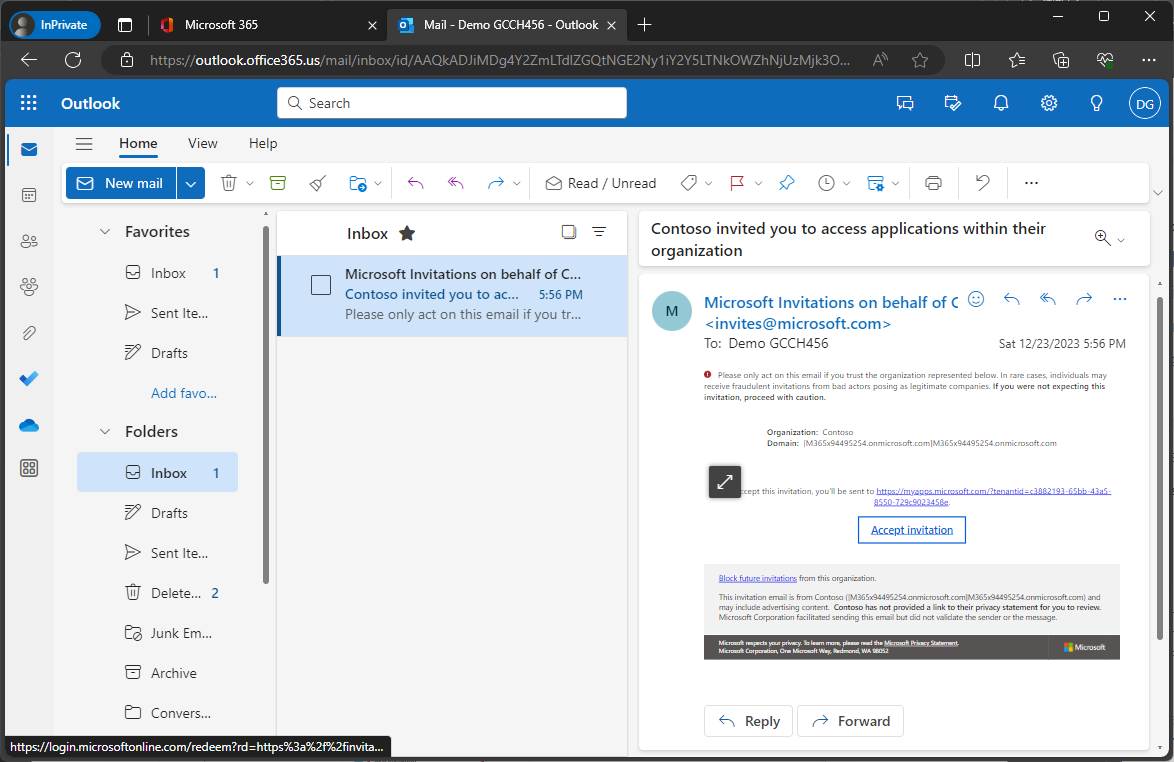
- In the partner tenant, the user should have an email invitation.
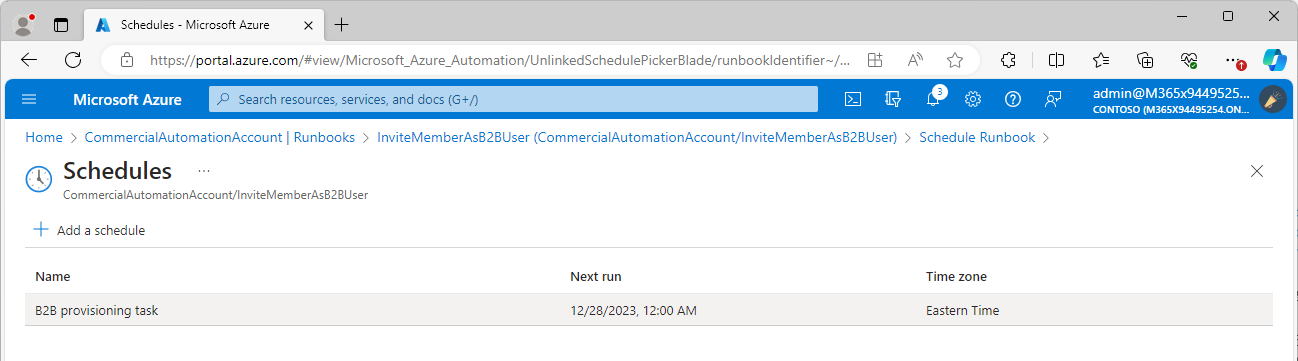
Creating a sync schedule
The final step in getting all of the automation set up is configuring a schedule to manage when the PowerShell runbook executes.
You’ll need to create a schedule in each tenant where a PowerShell runbook has been configured to automate the B2B provisioning process.
Repeat these steps in each tenant:
- Navigate to Automation Accounts in the Azure portal (https://portal.azure.com/#view/HubsExtension/BrowseResource/resourceType/Microsoft.Automation%2FAutomationAccounts for worldwide/commercial or https://portal.azure.us/#view/HubsExtension/BrowseResource/resourceType/Microsoft.Automation%2FAutomationAccounts for GCCH).
- Select the Automation Account that has been configured with a runbook.
- Under Shared Resources, select Schedules.
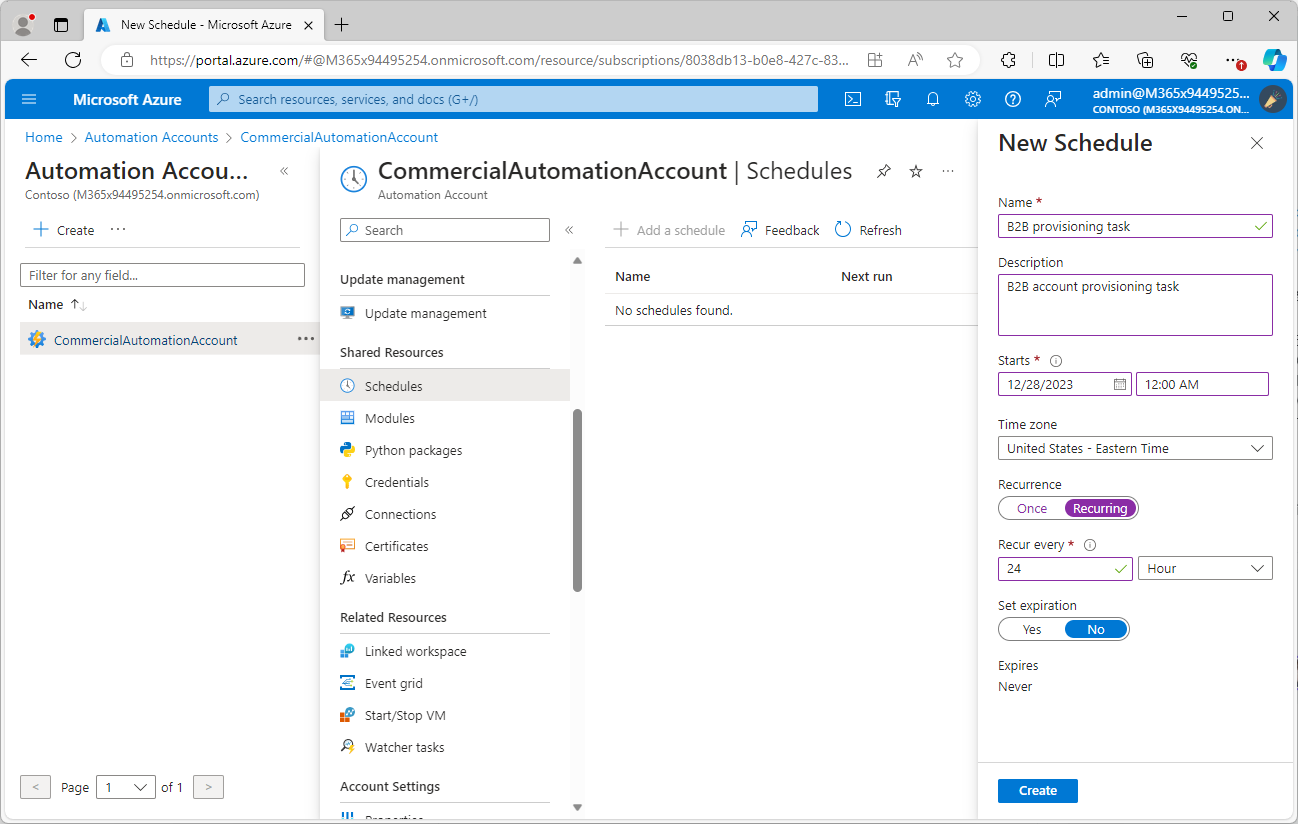
- Click Add a schedule.
- Configure a schedule. You’ll want to make sure it’s in-line with the settings you have configured as part of the PowerShell runbook code for querying new users. Click Create when finished.
- Under Process Automation, select Runbooks.
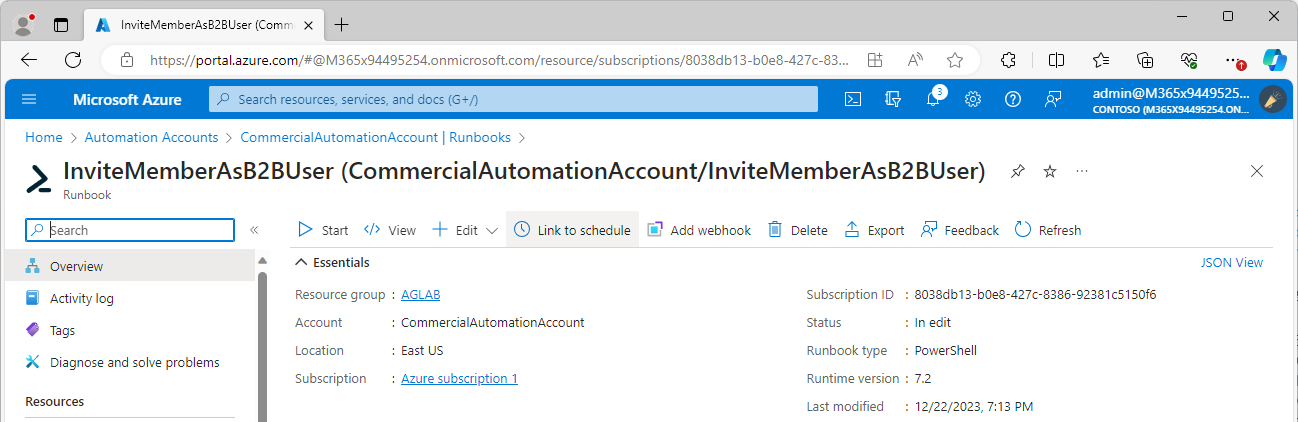
- Select the runbook containing the B2B provisioning code.
- On the Overview page, select Link to schedule.
- Select Link a schedule to your runbook.
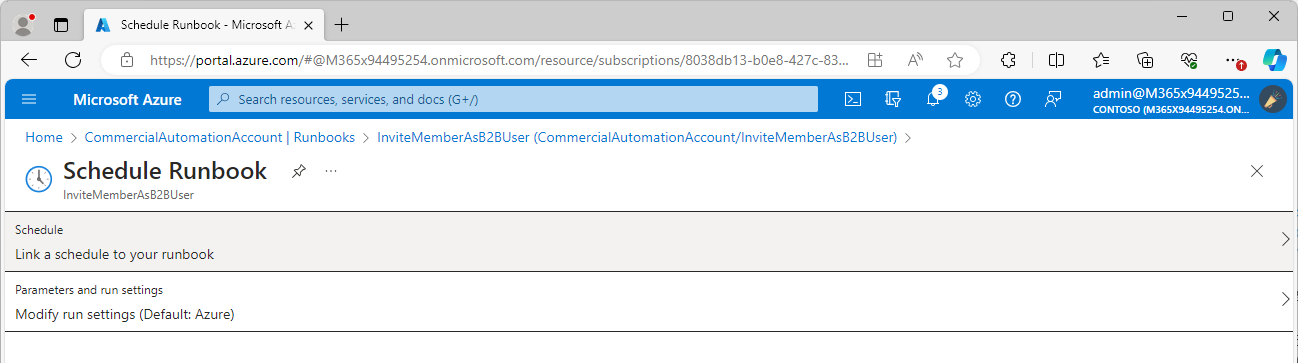
- Select the Schedule.
- Click OK.
The runbook will kick off at the appointed time and will follow the configured schedule.
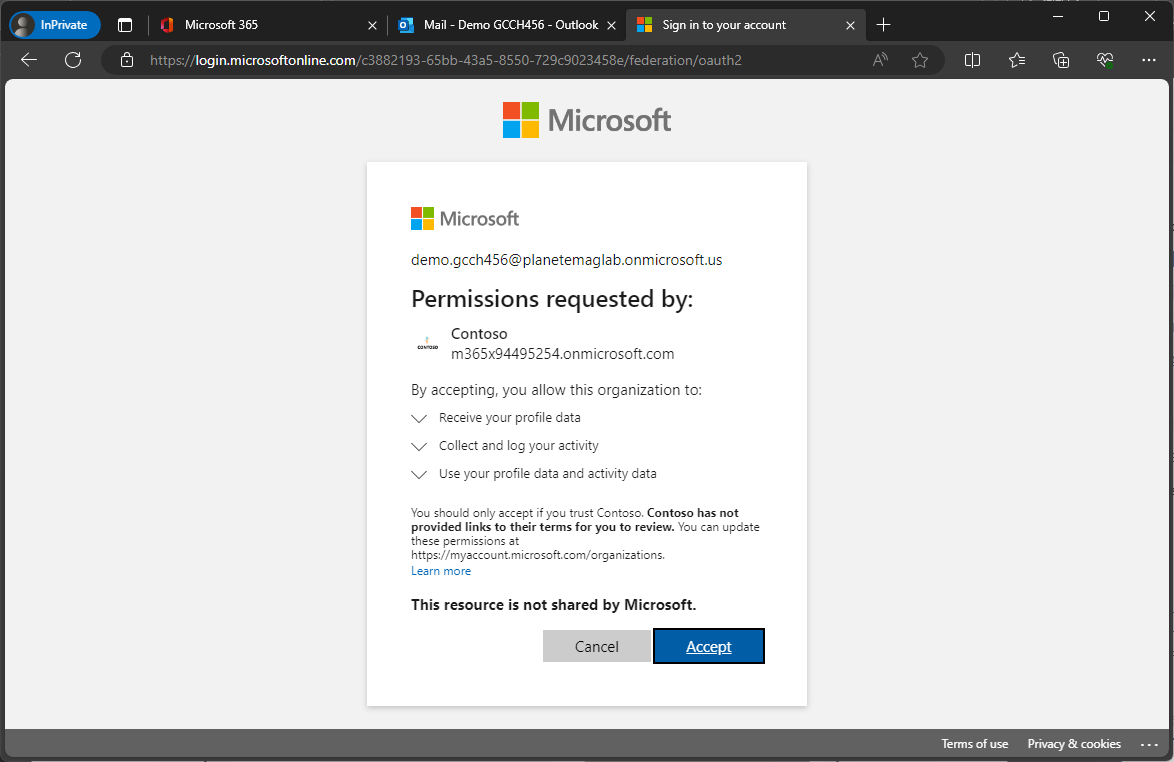
Redeeming the invitation
Once a cross-cloud user has been processed, they should receive an invitation.
Upon clicking Accept invitation in the body of the email, they will be asked to consent to the partner organization collecting information about their usage of the tenant.
After the invitation has been accepted, the corresponding account in the Azure portal (in the partner tenant) should reflect the change of invitation status from PendingAcceptance to Accepted.

Notes
For those wishing to dig in a little deeper or expand their scripting, here are some thoughts.
Licensing
Whatever you do, do not grant the provisioned B2B user accounts a SKU that includes Exchange Online. The B2B invitation process requires a primary SMTP address (and corresponding proxyAddresses array entry) that is outside your tenant’s verified domains. If you assign an Exchange Online license (either standalone or part of a suite), any unverified proxy addresses on the object get dropped and you won’t be able to complete the B2B invitation process.
Mail-enablement
Since you are synchronizing existing mailbox-enabled objects (either on-premises mailboxes or migrated/remote user mailboxes), your objects already should be visible in the target GAL as mail-enabled users (MEUs). If, for some reason, they are not, you can unhide them to allow them to show up in the cross-tenant GAL.
B2B provisioning requirements
In the Azure portal, there is a button for converting a user to a guest (which we are utilizing in an automation context):

This button is available regardless of whether a user is eligible for conversion or not, which makes it tricky to troubleshoot. If you’ll recall, one of the transforms added to the sync rules was to send an AuthoritativeNull value for onPremisesUserPrincipalName. This is necessary to allow the B2B invitation for synchronized members to work (as per https://learn.microsoft.com/en-us/entra/external-id/invite-internal-users#how-to-invite-internal-users-to-b2b-collaboration):
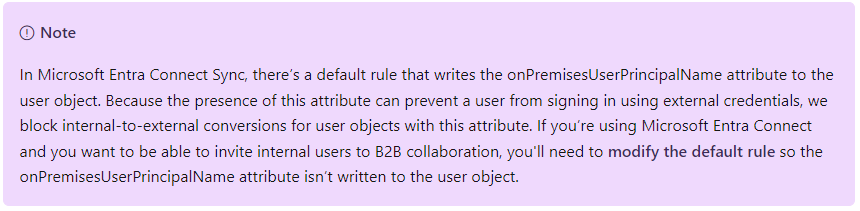
Unfortunately, simply deleting the rule from the Synchronization Rules Editor doesn’t do the trick, so you must update the flow to send the AuthoritativeNull value.
What’s interesting, however, is that regardless of whether you have configured the flow or not, a synchronized user’s properties will show a value (it’s constructed either way in the MV). It’s weird. I don’t understand it. See the following reference images:
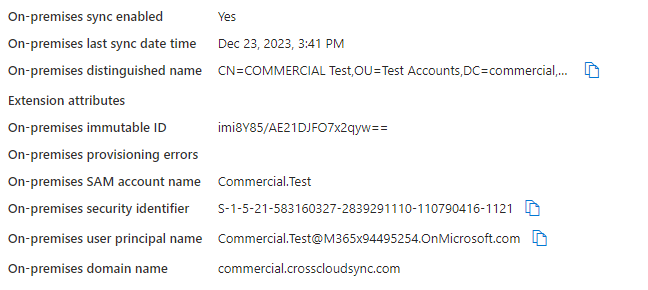
Improperly configured object |
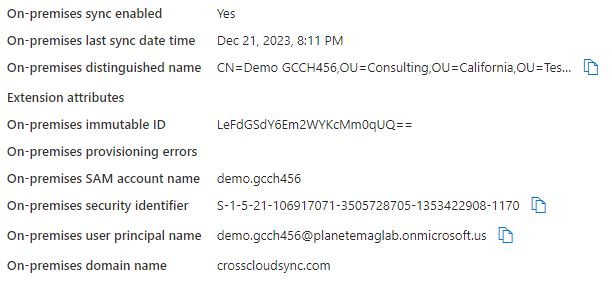 Properly configured object |
They are literally indistinguishable. The only time you’ll see the error is when you go to invite the incorrectly configured user.
Clicking Convert to external user will bring up the Convert to external user flyout:
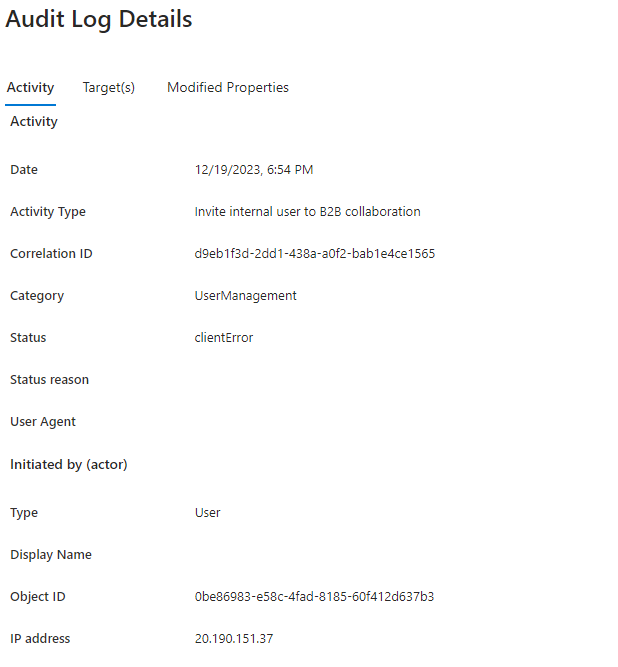
After clicking Send invite, the user interface will return a non-descript error. When viewing the details in the Audit log, it will only reveal clientError as the Status, typically with no Status reason.
Expansion ideas
The included scripting really just scratches the surface. Depending on your business processes, you may want to include features like:
- Capture the user identities provisioned and generate a summary email at the end of the processing (or kick of a Power Automate flow to post to a Teams channel)
- Log or capture any synchronization errors and send to an administrator
You also might want to consider dynamic group membership criteria or configuring access packages to automatically grant B2B users access to applications, sites, or teams.
There are a lot of great capabilities for collaboration once you get some form of either cross-cloud or cross-tenant synchronization enabled.
- Go forth and synchronize!